
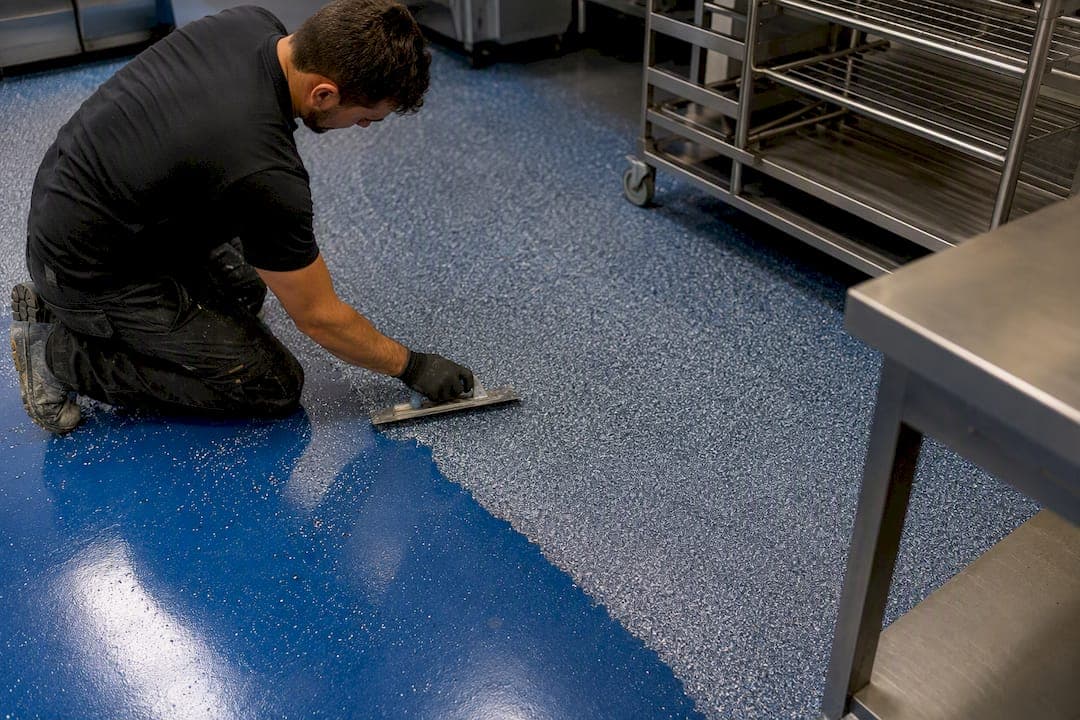
For most restaurant back-of-house floors, quartz broadcast epoxy is the right call, and where your line deals with steam cleaning or thermal shock (dishpit, walk-in coolers, protein processing), polyurethane cement outperforms it. Every system you consider needs four things regardless of brand or price: a seamless monolithic surface with no grout lines to trap bacteria, an integral cove base at the wall junction, enough slip-resistant aggregate to hit a wet coefficient of friction of at least 0.42, and professional-grade surface prep before a drop of resin goes down.
Non-negotiables to bring to any contractor conversation:
- Seamless, monolithic floor with zero grout joints
- Integral cove base turning up the wall, not caulked trim
- Aggregate broadcast rated for wet-area slip resistance
- Diamond-ground substrate, not just an acid etch or a light buff
Show Me Epoxy builds every commercial job on diamond-grinding prep specifically because it produces the mechanical bond that keeps these floors from lifting under rolling carts and daily steam mopping.
Key Takeaways
The right commercial kitchen floor pairs quartz broadcast or polyurethane cement epoxy with a seamless cove base, ≥0.42 wet COF and diamond-ground prep to meet both safety code and health inspection standards.
| Point | Details |
|---|---|
| Match system to zone | Use quartz broadcast for general back-of-house and polyurethane cement for steam or thermal-shock areas like dishpits and coolers. |
| Hit the slip target | Aim for a dynamic wet COF of at least 0.42 through aggregate broadcast density or a textured topcoat. |
| Get cove base dimensions right | Require a minimum 4 inch upturn with a 3/4 inch radius, or 6 inches in high-spec kitchens. |
| Demand real surface prep | Diamond grinding plus MVER or RH testing before coating prevents most delamination and blistering failures. |
| Budget by system | Expect roughly $11 to $18 per square foot for quartz broadcast and $14 to $22 for polyurethane cement, plus cove base and drain work. |
| Work with a local diamond-grind specialist | Showmeepoxy applies diamond-grinding prep and industrial-grade materials on commercial jobs, with a free calculator to scope your budget before a quote. |
Table of Contents
- What Is the Best Commercial Kitchen Epoxy System?
- What Slip Resistance and Cove Base Specs Does an Inspector Check?
- How Much Does Commercial Kitchen Epoxy Cost to Install?
- How Do You Prep a Kitchen Floor for Epoxy?
- What's the Best Way to Clean and Maintain Epoxy Kitchen Floors?
- Can Epoxy Handle Heavy Equipment and Constant Foot Traffic?
- How Well Does Epoxy Resist Kitchen Chemicals and Degreasers?
- What Ventilation and Safety Gear Does Epoxy Installation Require?
- Why Do Some Epoxy Kitchen Floors Crack or Delaminate?
- What Regulations Beyond Food Safety Apply to Kitchen Floors?
- What Should You Look for in an Epoxy Flooring Contractor?
- Get a Local Commercial Epoxy Quote from Show Me Epoxy
- Sources
What Is the Best Commercial Kitchen Epoxy System?
Not every zone in your kitchen needs the same flooring chemistry, and treating a walk-in cooler the same as your dry storage room is one of the more expensive mistakes a kitchen manager can make. The right approach matches the resin system to what that specific zone actually does to the floor every day.
Quartz broadcast epoxy is the standard for most back-of-house areas: the cook line, prep stations, and general traffic zones. It's built in layers: a primer coat that bonds to the concrete, a pigmented epoxy base, a broadcast of colored quartz aggregate to the point of rejection (meaning the floor can't absorb any more), a grout coat that locks the aggregate in place, and a clear urethane or polyaspartic topcoat for chemical and abrasion resistance. That aggregate layer is what generates slip resistance. Expect a 10 to 15 year service life with proper maintenance.
Polyurethane cement, also called urethane mortar, is a thicker, cement-fortified system built for punishment. Manufacturers and installers recommend it specifically for dishpit aprons, walk-in cooler thresholds, and any zone with heavy steam cleaning or thermal cycling, because it tolerates temperature swings and hot-water washdown that would eventually crack a standard epoxy. It costs more, but in zones where epoxy fails first, that premium pays for itself.
Thin decorative epoxy and polyaspartic topcoats belong in dry storage, front-of-house dining areas, or offices adjacent to the kitchen. They look sharp and install fast, but they're too thin to survive standing water or heavy aggregate wear. Installed in a wet cook line, they blister and delaminate within a year or two.
Quick comparison:
- Quartz broadcast: best all-around back-of-house choice, moderate cost, 10 to 15 year lifespan
- Polyurethane cement: best for thermal shock zones, higher cost, often 15+ years
- Thin decorative epoxy: fast and affordable, but wrong for wet zones
- Polyaspartic topcoat alone: fast cure, good UV stability, works over an existing broadcast system
What Slip Resistance and Cove Base Specs Does an Inspector Check?
Health inspectors and safety auditors aren't guessing when they walk your floor. They're checking against specific, quantifiable standards, and knowing those numbers before your contractor quotes the job saves you a failed inspection later.
- Slip resistance: ANSI A1264.2 sets a minimum dynamic coefficient of friction of 0.42 for wet walking surfaces. You reach that number through aggregate broadcast density (more quartz, more grip) or a textured topcoat applied over a smoother base. A floor that looks glossy and finished can still fail wet slip resistance tests if the broadcast rate is insufficient.
- Cove base dimensions: industry practice calls for a minimum 4 inch upturn at the wall with a 3/4 inch radius, stepping up to 6 inches in higher-spec kitchens like those handling raw protein. The radius matters because a sharp corner traps grime and is nearly impossible to sanitize.
- Slope to drains: expect roughly 1/4 inch of fall per foot, tied into bonded stainless steel drains, not floor-mounted units that leave a seam for water to undercut.
- Material standards: reference NSF/ANSI 51 and the FDA Food Code when specifying materials for food-contact zones. Seamless, nonporous resinous flooring is what both standards point toward, since tile grout and vinyl seams give bacteria somewhere to live that epoxy simply doesn't.
How Much Does Commercial Kitchen Epoxy Cost to Install?
Budget realistically before you call for quotes, because the spread between systems is wide enough to change your decision. Representative installed pricing runs $11 to $18 per square foot for quartz broadcast, $14 to $22 for polyurethane cement, and $9 to $16 for decorative metallic epoxy in lower-traffic zones. Cove base and drain modifications add cost per linear foot and per drain, separate from the field square footage.
What actually drives your number up or down:
- Substrate condition: cracked or contaminated concrete needs repair before anything else
- Moisture mitigation: a slab with high vapor emission needs an extra system layer
- Drain and cove work: more linear feet of wall junction means more labor
- Access restrictions: a landlocked kitchen with no loading dock costs more to service
A typical timeline runs 1 to 2 days for grinding and prep, 1 to 3 days for the build-up layers depending on system complexity, and light foot traffic can often resume within 24 hours of the final coat, with full rolling-cart traffic waiting closer to 3 to 5 days for full cure. A well-installed quartz broadcast or urethane mortar floor amortizes that closure cost fast against 10 to 15+ years of service, versus a cheaper coating that needs replacing every 3 to 4 years.
How Do You Prep a Kitchen Floor for Epoxy?
The floor's entire lifespan gets decided before any resin is mixed. Diamond grinding is the preferred mechanical prep method because it opens the concrete's pore structure and creates a profile the epoxy can genuinely key into, rather than just sit on top of. Chemical etching or a light mechanical buff can leave contaminants and laitance behind, which is a common cause of the delamination that shows up 6 to 18 months later.
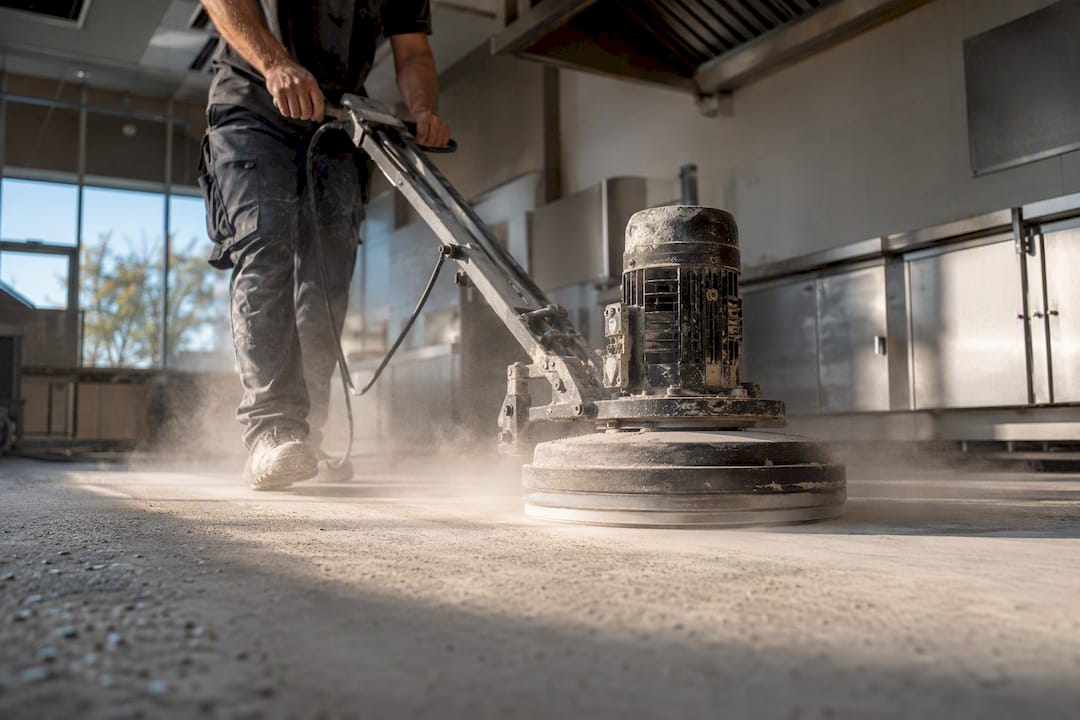
Before any coating goes down, a competent installer runs a moisture vapor emission rate (MVER) test or relative humidity test, checks the slab for soundness, and repairs cracks, spalling, or unsound tile substrate. Skipping this step to save a day of labor is the single most common reason commercial floors fail early.
The layer sequence for a quartz broadcast system runs: primer, pigmented base coat, quartz broadcast to rejection, grout coat, and a urethane or polyaspartic topcoat, with an inspection and cure check between each stage.
Pro Tip: Ask any bidding contractor to put their MVER testing method and results in writing as part of the proposal, not just verbal assurance. A floor that fails moisture testing and gets coated anyway will blister, and that's a warranty argument you don't want to have after the fact.
A permanent bond isn't a marketing phrase. It's the mechanical result of grinding the concrete open, testing it for moisture, and repairing what's unsound before the first primer coat touches the slab.
What's the Best Way to Clean and Maintain Epoxy Kitchen Floors?
A properly installed floor still needs a maintenance routine matched to a wet, greasy environment, and skipping it shortens the life of even a premium system.
- Daily cleaning: use an approved degreaser, not a generic all-purpose cleaner, since grease film is what erodes slip resistance fastest. Squeegee standing water toward drains rather than letting it pool, and mop with clean water changes rather than dragging the same greasy bucket across the whole floor.
- Periodic maintenance: plan on a topcoat refresh every few years in the highest-traffic zones, and have the installer re-profile aggregate in spots where it's worn smooth. Inspect cove base seams quarterly for separation from the wall.
- Stain and damage repair: minor chips or heavy-impact gouges from dropped equipment need patching before they become water-intrusion points; call the original installer for restoration rather than a generic handyman patch.
- Sanitation alignment: a seamless, cleanable surface is exactly what health inspectors expect to see during a walkthrough, and documented cleaning logs make that inspection faster. A general flooring maintenance guide can help managers build a consistent routine across multiple properties.
Can Epoxy Handle Heavy Equipment and Constant Foot Traffic?
Rolling carts, stand mixers on wheels, walk-in racking systems, and a line cook's boots moving hundreds of times a shift put very different stress on a floor than a retail showroom does. A properly built quartz broadcast or polyurethane cement system handles both static equipment loads and constant rolling traffic without the surface cracking or compressing, because the resin layer distributes point loads across the aggregate matrix rather than concentrating stress in one spot.
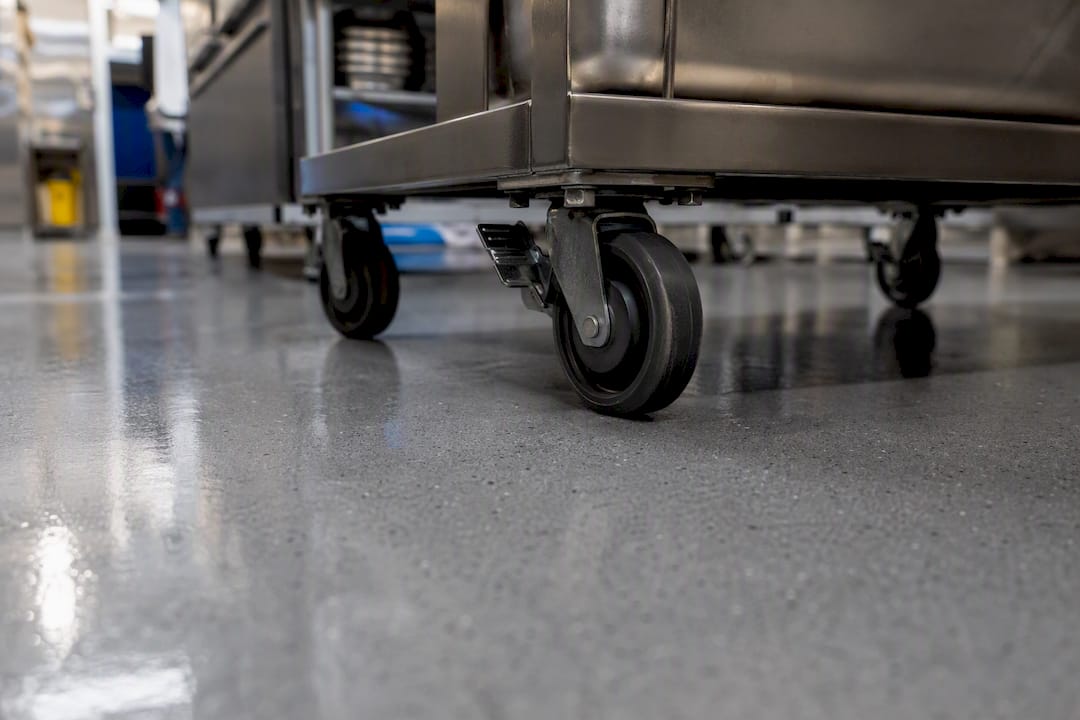
Where problems show up is usually at the edges: equipment legs with steel feet dragged across the floor during cleaning, or a dropped ice machine that chips the topcoat on impact. Rubber or nylon equipment casters are far gentler on the surface than steel wheels, and it's worth specifying caster material when you're buying new rolling racks or carts for a freshly coated kitchen.
Heat is the other variable managers underestimate. A fryer basket or a hot sheet pan set directly on standard epoxy can scorch the topcoat, while polyurethane cement tolerates that kind of thermal spike far better, which is part of why it's the standard recommendation for zones near fryers and steam equipment.
For genuinely heavy static loads, like a walk-in cooler compressor pad or a permanently mounted piece of equipment, confirm with your installer that the build thickness and aggregate density in that specific spot match the load, since a thin decorative system under a 2,000 pound piece of equipment is asking for trouble regardless of how well the rest of the kitchen was done.
How Well Does Epoxy Resist Kitchen Chemicals and Degreasers?
Commercial kitchens run a rotating chemical assault: citrus-based degreasers, chlorine sanitizer, hot oil, vinegar, and industrial floor cleaners, often within the same shift. A quartz broadcast or polyurethane cement system with a urethane or polyaspartic topcoat resists staining and etching from all of these far better than sealed concrete, tile grout, or vinyl composition tile, which is a core reason suppliers position resinous flooring as the standard for demanding commercial environments.
That said, not every epoxy resists everything equally. Standard epoxy topcoats can soften slightly under prolonged exposure to strong solvents or undiluted bleach left standing rather than rinsed. Polyaspartic topcoats generally outperform straight urethane on chemical resistance and also cure faster, which matters if you're trying to minimize kitchen downtime during a topcoat refresh.
Grease is the sneakier threat. It doesn't chemically attack the coating the way an acid might, but it breaks down slip resistance over time by filming over the aggregate texture, which is why a proper daily degreasing routine matters as much for safety as it does for appearance. A floor that looks clean can still be dangerously slick if grease has coated the peaks of the aggregate profile.
Ask your contractor specifically which topcoat chemistry they're proposing and request the product data sheet's chemical resistance chart. A generic "epoxy coating" quote without a named topcoat product is a quote you should push back on.
What Ventilation and Safety Gear Does Epoxy Installation Require?
Epoxy and polyurethane resins off-gas solvents and reactive compounds during application and cure, and that's a real concern in an enclosed commercial kitchen with limited natural airflow. A competent installer sets up mechanical ventilation, running fans and, where needed, exhaust ducting to move fumes out of the space rather than letting them build up in a closed kitchen.
Installation crews should be working in appropriate personal protective equipment: respirators rated for organic vapors during resin mixing and application, chemical-resistant gloves, and eye protection, since uncured epoxy and polyurethane components can irritate skin and eyes on contact. If your contractor shows up without this gear, that's worth asking about before they start.
For kitchen staff and management, the practical safety step is closure planning. Most systems require the space to be cleared of people during application and through the early cure window, and reentry timing depends on the specific product's cure schedule. Some fast-cure polyaspartic topcoats allow foot traffic within hours, while other systems need a full day or more before it's safe to breathe the space without ventilation running. Confirm reentry timing with your contractor in writing, not as a verbal estimate, especially if you're planning to reopen for service the next morning.
Why Do Some Epoxy Kitchen Floors Crack or Delaminate?
Most epoxy failures trace back to one of three root causes, and all three are preventable at the prep and installation stage rather than something you can fix later with a quick patch.
Delamination, where the coating separates from the concrete in sheets or bubbles, is almost always a surface prep failure. It happens when a contractor skips diamond grinding, coats over laitance or contamination, or applies resin over a slab with excess moisture vapor that wasn't tested first. Once a floor delaminates, patching the local area rarely holds. It usually means grinding out the affected zone and recoating.
Blistering, small bubbles that form in the cured coating, is typically a moisture-related issue too, sometimes combined with applying the coating too thick or in temperature conditions outside the product's spec. Trapped moisture vapor pushes up through the cured film as it tries to escape.
Cracking usually reflects a substrate problem, not a coating problem. If the underlying concrete has an active crack that wasn't properly routed and filled before coating, that crack will telegraph through the epoxy over time, especially under the temperature swings and heavy point loads common in kitchens. Thermal shock in zones near steam equipment or walk-in coolers can also stress a standard epoxy system, which is another reason polyurethane cement is specified in those spots.
The fix for all three is the same: don't skip the diagnostic and repair steps at the start of the job.
What Regulations Beyond Food Safety Apply to Kitchen Floors?
Food-contact material standards get most of the attention, but commercial kitchen floors also fall under general workplace safety rules that carry their own liability if ignored. OSHA's general duty clause and walking-working surface standards require employers to maintain floors free of recognized slip and trip hazards, which means a kitchen floor that's lost its slip resistance isn't just a maintenance issue, it's a compliance exposure if an employee gets hurt.
Local building and health codes typically layer on top of this: many jurisdictions require the cove base, slope-to-drain, and seamless surface specifications discussed earlier as a condition of kitchen occupancy permits, not just a best practice. ADA considerations can also come into play at transitions between flooring types, since abrupt height changes at doorways or between dining and kitchen zones can create trip hazards for both staff and delivery personnel.
Insurance carriers increasingly ask about flooring condition during commercial policy underwriting or renewal for restaurants, since slip-and-fall claims are one of the most common liability categories in foodservice. Keeping documentation of your flooring installation, including the aggregate specification and any COF testing, gives you something concrete to point to if a claim or an inspection ever challenges the floor's condition.
What Should You Look for in an Epoxy Flooring Contractor?
The corners installers cut are rarely visible on the surface, which is exactly why they get cut. Skipping the cove base radius, running a light broadcast rate to save on aggregate cost, or coating over a slab that never got moisture tested all produce a floor that looks fine at handoff and fails within a year or two.
Before you sign anything, require the contract to include a written MVER or RH test report, safety data sheets and product data sheets for every material going down, a dated photo log of the prep and build stages, and warranty language that specifies what's covered and for how long. A contractor confident in their work will hand these over without hesitation. One who hedges on documentation is telling you something.
— Stephen
Get a Local Commercial Epoxy Quote from Show Me Epoxy
Showmeepoxy builds every commercial kitchen floor on the same diamond-grinding surface prep covered above, paired with industrial-grade quartz broadcast and polyurethane systems suited to Missouri's seasonal humidity and temperature swings. Turnaround on most commercial jobs runs faster than kitchen owners expect, minimizing the closure window that eats into revenue.

If you're weighing systems and budgets right now, the commercial epoxy flooring page walks through what a typical kitchen installation looks like from prep to final topcoat, and the free cost calculator gives you a real budget number before you ever schedule a walkthrough. Showmeepoxy backs its work with honest pricing and no-pressure consultations, so request a quote and get a firm number for your kitchen before your next slow season.
Sources
- Restaurant Epoxy Flooring: Pros, Cons, and Buying Guide - D and G Flooring
- Commercial and Industrial Kitchen Flooring - Sherwin-Williams
- Epoxy Kitchen Flooring | Epoxy Flooring for Kitchen - HPS Flooring