
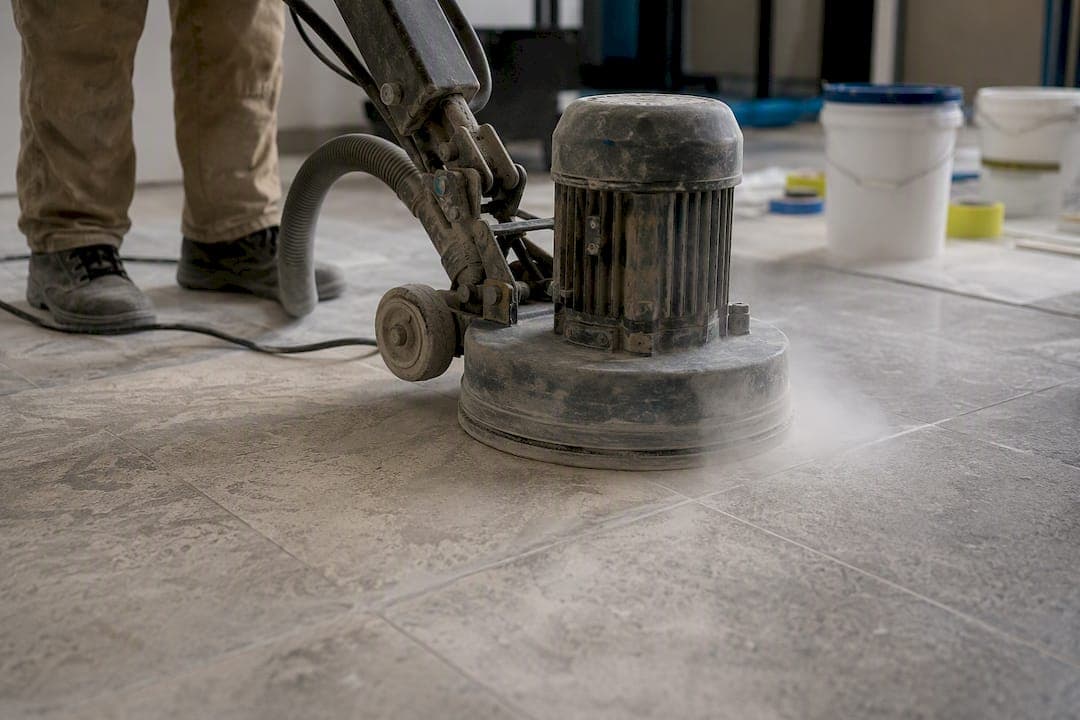
Epoxy over tile floor projects can work, but only when three conditions line up. First, the tile has to be sound: no drummy or hollow spots when you tap it. Second, moisture readings under the slab need to fall within the epoxy manufacturer's limits, tested with a relative humidity probe or a calcium chloride kit. Third, you need to actually commit to the prep, not just the coating.
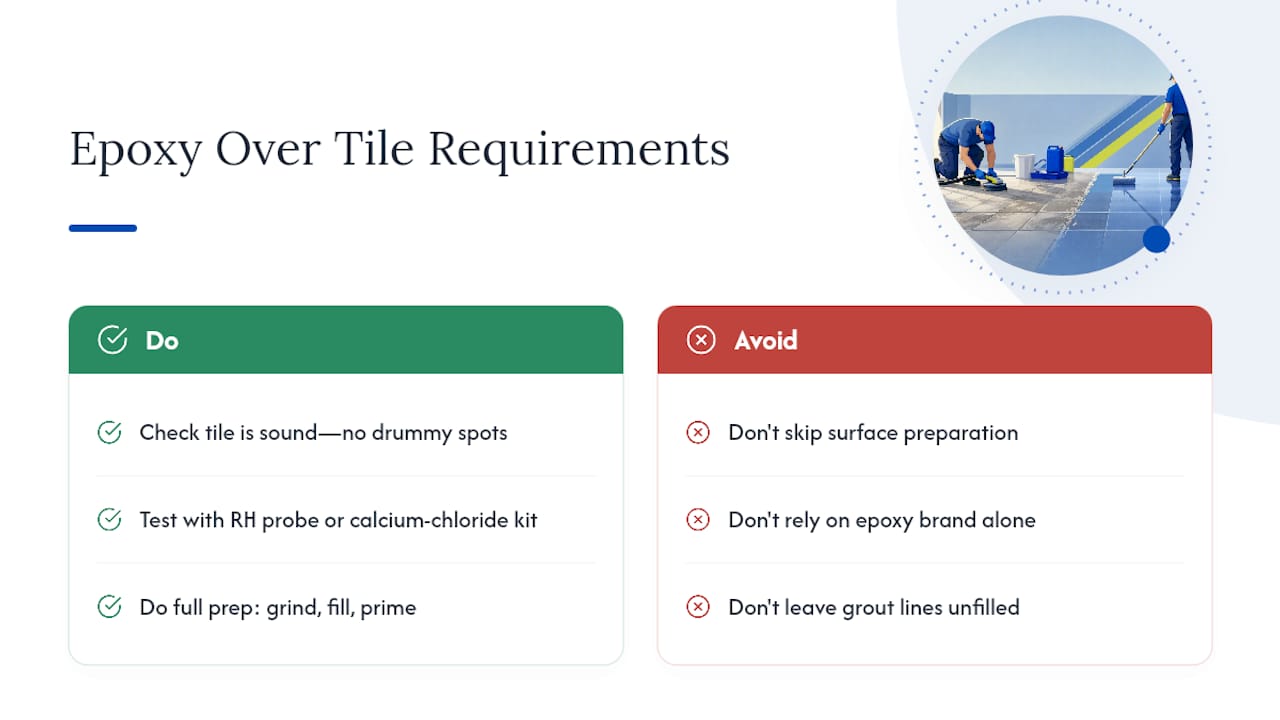
That prep means diamond grinding or aggressive scuffing to kill the tile's glaze, filling grout lines so they don't telegraph through the finish, and priming anything vitrified or non-porous. Skip any of that and you're gambling on a floor that looks fine for six months and then bubbles or peels. Real World Epoxies notes that adhesion over tile comes down to surface profile and tile condition, not the epoxy brand you pick. Companies like Showmeepoxy build their process around that exact principle, treating surface preparation as the job, not a footnote before it.
Key Takeaways
Epoxy over tile works reliably only when the tile is sound, moisture readings pass, and surface prep includes real diamond grinding, not shortcuts.
| Point | Details |
|---|---|
| Run the tap test first | Tap every tile with a screwdriver handle; hollow sound means it needs removal, not coating. |
| Test moisture before anything else | Use a relative humidity probe or calcium chloride test against your epoxy's TDS limits. |
| Grind, don't just etch | Diamond grinding creates the mechanical profile glazed tile needs for real adhesion. |
| Always run a patch test | Coat a small section, let it cure, and try to lift it before committing to the full floor. |
| Know your cost range | Expect roughly $3 to $12 per square foot depending on tile condition and finish options. |
| Call a pro for complex jobs | Showmeepoxy handles large areas, moisture concerns, and high-traffic spaces with diamond-grinding prep and a written, itemized quote. |
Table of Contents
- Pros and Cons of Coating Tile With Epoxy
- When You Should Remove Tile Instead of Coating It
- What Tools and Materials Do You Need?
- How Do You Prep a Tile Floor for Epoxy?
- How Do You Apply Epoxy Over Tile?
- Common Problems After Installation and How to Fix Them
- What Does Epoxy Over Tile Cost and How Long Does It Take?
- When Should You Hire a Professional Installer?
- The Real Test Isn't the Epoxy, It's the Prep
- Get a Professional Assessment From Showmeepoxy
- Sources
Pros and Cons of Coating Tile With Epoxy
Coating over tile beats ripping it out in a few concrete ways, but it isn't free of risk either. Here's the honest breakdown.
Pros:
- No demolition means no dumpster, no jackhammering, and days less dust and noise in your living space.
- A seamless epoxy surface eliminates the dirt-trapping grout lines that make tile floors hard to keep clean.
- Cured epoxy resists grease, salt, and most household chemicals better than grout ever did.
- A properly prepped and coated tile floor can last years in normal residential traffic.
- You avoid the structural guesswork of finding out what's under the tile.
Cons:
- Grinding, degreasing, and grout filling is genuinely labor-intensive, often nearly as much work as tearing the tile out.
- Loose tiles or trapped moisture underneath can cause delamination no coating will fix.
- Grout lines can "ghost" through a leveled surface if the filler and epoxy don't move together with temperature changes.
- Coating raises floor height slightly, which can create problems at door thresholds or transitions to other rooms.
Pro Tip: If your main goal is hiding grout lines completely, grinding plus a self-leveling epoxy gives the cleanest look, but it costs more in labor and material. Leaving grout lines visible and disguising them under a decorative flake broadcast is the cheaper route, and it hides minor imperfections better than a smooth, leveled surface does.
The trade-off between filling grout and leaving it is really a budget decision as much as an aesthetic one.
When You Should Remove Tile Instead of Coating It
Some floors just aren't candidates, and no amount of epoxy skill changes that. Watch for these red flags before you buy a single gallon of primer:
- More than 10 to 15% of tiles sound hollow or "drummy" when tapped with a screwdriver handle.
- Active moisture intrusion, visible efflorescence, or musty odors coming from below the tile.
- Cracked tiles that trace back to substrate movement, not just surface damage.
- Grout that's crumbling or missing across more than roughly 30% of the joints.
Ignore these and you'll likely see delamination within months, blistering where trapped moisture pushes up through the coating, or cracks that mirror whatever movement is happening underneath. If the problem tiles are isolated, you can often remove just those, patch and level the spot, and coat over the rest. Widespread problems call for full removal, and at that point, comparing the true cost of tiling versus epoxy is worth doing before you commit either way.
What Tools and Materials Do You Need?
Renting the right equipment saves money; buying the wrong equipment wastes it. Here's how the list splits.
Rent:
- Diamond grinder (the single most important tool on this list, and usually the priciest to own outright)
- Shot blaster, if you're dealing with a large commercial-scale area and a rental yard has one available
Buy:
- Angle grinder with a diamond cup wheel for edges and tight corners the big grinder can't reach
- Heavy-duty degreaser and contaminant remover for kitchens or garages
- Shop vac with HEPA or dust-collection capability, non-negotiable for indoor grinding
- Polymer-modified cementitious leveler and epoxy slurry for filling low spots and damaged grout
- Tile-compatible primer, base epoxy or self-leveling epoxy, and a UV-stable clear or polyaspartic topcoat
- Flake or quartz broadcast material if you want texture or slip resistance
- Mixing drill with a paddle attachment, rollers, and spiked shoes for walking on wet epoxy
Mechanical profiling from a diamond grinder is what actually lets epoxy grip glazed or vitrified tile. Skipping it and relying on chemical etching alone is the single most common mistake DIYers make on this kind of project.
How Do You Prep a Tile Floor for Epoxy?
Preparation is where epoxy-over-tile projects succeed or fail, full stop. SaniGlaze's installation guidance treats surface prep as the single most critical factor in whether the coating holds, and every step below exists to protect that bond.
-
Tap-test every tile. Walk the whole floor with a screwdriver handle or metal rod, tapping each tile and listening for a hollow sound. A drummy tile has already lost its bond to the substrate and needs to come out, not get coated over.
-
Check for cracks and map contamination. Note any cracked tiles, then look for grease spots, wax buildup, or sealer residue, especially in kitchens and near old furniture legs. Each of those spots needs targeted degreasing before grinding even starts.
-
Test the moisture level. Run a relative humidity probe test or a calcium chloride MVER (moisture vapor emission rate) test according to the epoxy manufacturer's technical data sheet. If readings exceed the stated limit, you either need a moisture-mitigating primer system or you need to address the source of the moisture before coating anything.
-
Grind the entire surface. Diamond grinding removes the glaze from ceramic and porcelain tile and creates the mechanical profile epoxy needs to bite into. Work in overlapping passes, keep the grinder connected to a HEPA-rated vacuum the whole time, and don't rush corners. Where a diamond grinder can't fit, use an angle grinder with a diamond cup wheel.
-
Decide on grout treatment. If you want a flush, seamless look, fill grout lines with a leveling compound up to about 5mm deep where needed, checking that the leveler is compatible with your epoxy system per the product's technical data sheet. If you're leaving grout lines visible, just make sure they're clean and structurally sound.
-
Vacuum and degrease again. Grinding dust settles into every low spot. A second pass with the shop vac followed by a degreaser wipe-down keeps that dust from becoming a bond-killing layer under your primer.
-
Run a patch test. Prime and coat a small, inconspicuous section, maybe two square feet, and let it cure fully per the TDS. Try to scrape or peel it at the edge with a putty knife. If it holds firm, you're clear to coat the full floor. If it lifts easily, go back and grind harder, add a bonding primer, or reconsider whether that section needs tile removal instead.
Pro Tip: Photograph your grinding pass on glazed tile, your filled grout lines, and your passed patch test area before you move to full coating. Not only does this protect you if something goes wrong later, it gives you a reference for matching technique across the rest of the floor.
How Do You Apply Epoxy Over Tile?
Once your patch test passes, the actual coating work moves fast, but pot life and mixing discipline still rule everything.
-
Prime first if needed. Nonporous vitrified tile or anything with leftover sealer residue needs a bonding primer before base coat goes down. Specialist bonding primers exist specifically to help epoxy grip tile surfaces that would otherwise resist adhesion.
-
Mix in small, controlled batches. Epoxy systems use a fixed ratio of hardener to resin by volume, always follow the exact ratio printed on your product's technical data sheet, not a general rule of thumb. Mix only what you can apply within the stated pot life; off-ratio mixing is one of the top causes of soft spots or tacky floors that never fully cure.
-
Apply the base coat. Pour and spread a flood coat or self-leveling base across the primed surface, working in sections so you're never fighting a partially-set batch. Installers commonly repair low spots with epoxy slurry mixed from base epoxy and a thickening agent before this stage, so any leveling should already be done by now.
-
Broadcast flake or quartz while the coat is tacky, not wet. Timing matters here; too early and the material sinks, too late and it won't embed. Once cured, scrape and vacuum any loose material before the topcoat goes on.
-
Apply the topcoat. A clear epoxy or UV-stable polyaspartic topcoat protects the color coat and resists yellowing in rooms with direct sunlight, patios, or sunrooms in particular.
-
Manage cure time by zone. Keep foot traffic off entirely until tack-free, and hold off on furniture or heavy use until full chemical cure.
| Stage | Typical Timeframe |
|---|---|
| Tack-free (safe to walk in socks) | 12 hours |
| Light foot traffic | 48 hours |
| Furniture and normal use | 3–5 days |
| Full chemical cure | 5–7 days |
These ranges are typical, not universal. Always confirm exact numbers against your product's own technical data sheet before scheduling your project around them.
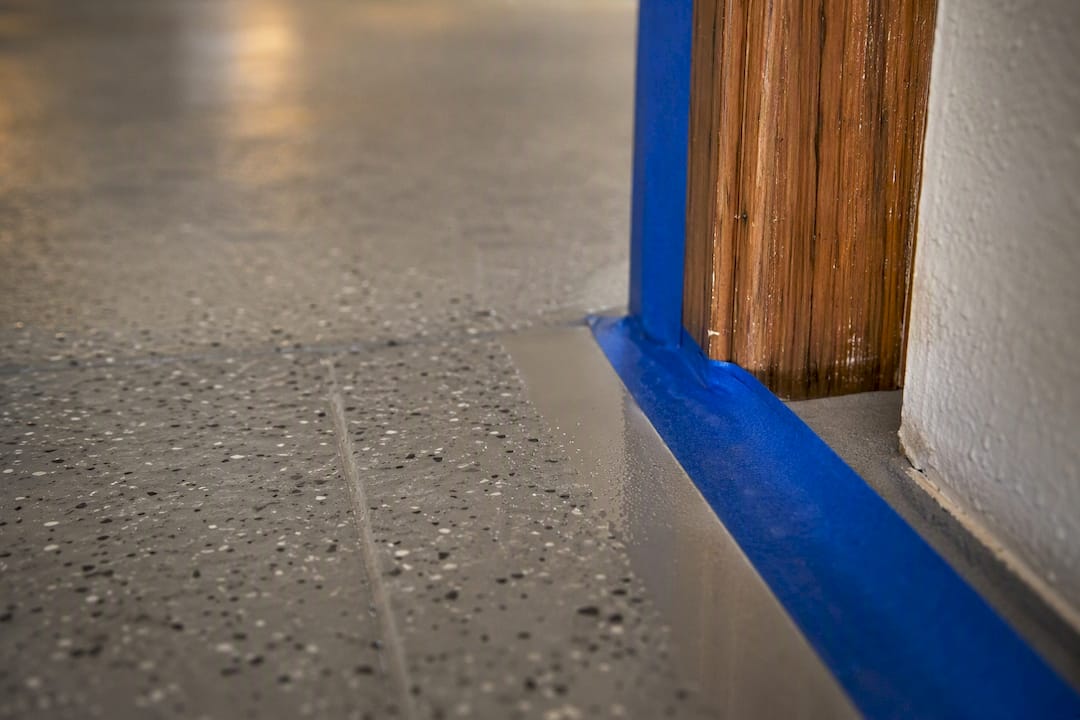
Pro Tip: At door thresholds and around built-in fixtures like cabinet toe-kicks, use painter's tape to create a crisp edge before your final coat, and pull it while the epoxy is still slightly soft. Waiting until full cure to remove tape often tears the coating line instead of leaving a clean edge.
Common Problems After Installation and How to Fix Them
Most failures show up within the first few weeks, and the symptom usually points straight to the cause.
- Delamination or lifting tiles: Almost always trapped moisture or a tile that was already loose before coating. Cut out the section, address the moisture source, and recoat, don't just patch over it.
- Pinholing or fish-eyes: Usually contamination left on the surface or an off-ratio mix. Sand the affected area lightly and recoat once you've confirmed the surface is fully degreased.
- Yellowing: A sign the topcoat wasn't UV-stable for a sunlit room. Recoating with a polyaspartic or UV-resistant topcoat solves it going forward.
- Grout ghosting: Leveling compound and epoxy expanding at different rates. Minor cases fade with time; severe cases need a full grind-and-relevel.
Don't apply another coat over a failing bond, it just adds weight the failing area can't support. And never use an open flame to pop bubbles in curing epoxy; use isopropyl alcohol misted lightly across the surface instead.
What Does Epoxy Over Tile Cost and How Long Does It Take?
Installed epoxy-over-tile projects typically run $3 to $12 per square foot, with most mid-range residential jobs landing between $5 and $9. Tile condition, how much leveling you need, and whether you want decorative flake all push that number up or down.
- Heavily damaged grout or numerous drummy tiles push a project toward the top of that range because of added repair labor.
- DIY saves on labor but adds tool rental costs, and a failed patch test or rework due to inexperience can erase most of that savings fast, as discussed in Avoiding Common Pitfalls: The Challenges of DIY Door Replacement.
- Expect two to three days for inspection, grinding, and repairs; one to two days for primer, base coat, and broadcast; then several more days of cure before furniture returns.
A free cost calculator can help you rough out numbers for your specific square footage before you commit to a DIY timeline or start collecting quotes.
When Should You Hire a Professional Installer?
Some jobs are DIY-friendly. Others aren't, and knowing the difference upfront saves real money.
Call a professional when the floor covers a large commercial area, when moisture readings come back borderline or you're unsure how to interpret them, when more than a handful of tiles are drummy, or when the space sees heavy daily traffic that leaves little room for a redo. Basements in particular deserve caution, since below-grade moisture is harder to diagnose and fix than surface-level issues.
Before hiring anyone, ask how they profile the surface (diamond grinding should be the answer, not just chemical etching), how they test for moisture, what warranty they offer, and whether they can show documented before-and-after photos from a past tile-over-epoxy job.
A solid pro visit includes an on-site assessment, a small patch test on your actual floor, a written quote that breaks out prep versus material costs separately, and a realistic timeline instead of a vague estimate. Showmeepoxy's diamond-grinding process reflects that same standard: grind first, test the bond, then coat, in that order, every time.
The Real Test Isn't the Epoxy, It's the Prep
Most guides on this topic oversell how easy epoxy-over-tile is, and that's the part I'd push back on hardest. The coating itself is almost the easy part. What separates a floor that lasts from one that bubbles within a year is entirely in the grinding, the moisture check, and the patch test, none of which are optional steps you can shortcut with a better product.
The other misconception worth correcting: homeowners assume skipping tile removal automatically saves serious money. Sometimes it does. Often the labor of grinding, filling grout, and priming rivals what tile removal would have cost anyway. The real win is less dust, less noise, and no dumpster in your driveway, not necessarily a smaller bill.
If you take one thing from this, let it be the tap test and the patch test. Do those two things honestly, and you'll know within an hour whether your floor is a real candidate or whether you're about to waste a weekend and a few hundred dollars in materials.
Get a Professional Assessment From Showmeepoxy
If your tap test turned up more drummy tiles than you expected, or your moisture readings came back borderline, that's exactly the situation where a professional assessment beats a DIY guess. Showmeepoxy builds every job, garage, basement, patio, or commercial space, around diamond-grinding preparation first, which is the same standard this guide just walked you through, except done with industrial equipment and years of pattern recognition for what a failing substrate looks like before it fails.

Homeowners across Mid-Missouri who've weighed the DIY grind-and-coat weekend against hiring it out often find the honest, no-pressure consultation clarifies the decision fast: a real quote with prep and materials broken out separately, not a vague number. If you're in the Jefferson City area, request a free quote and get a straight answer on whether your tile floor is a coating candidate or a removal job.
Sources
- Epoxy Flooring Over Tiles | Real World Epoxies
- Can You Install Epoxy Flooring Over Existing Tile? | SaniGlaze
- Epoxy Flooring Over Tiles: A Practical Guide – Floor Chem Depot
- Epoxy Over Tile Floor - Countertop Epoxy
- Can I Epoxy Over Tiles? | EpoxyFlooringCo.au