
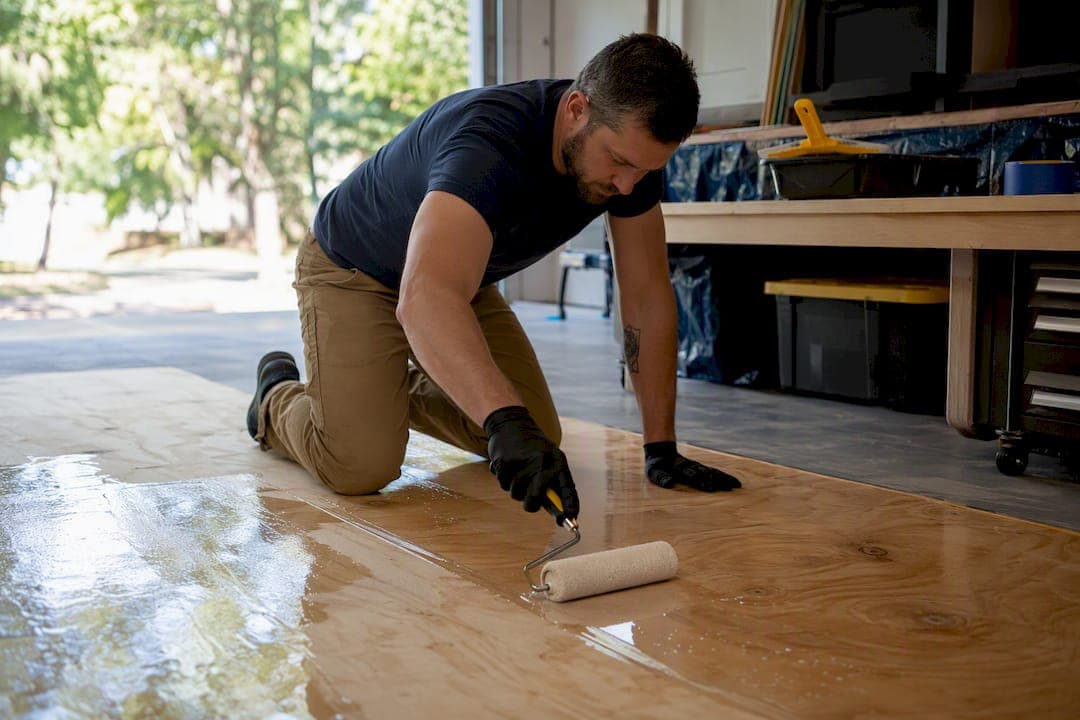
Yes, you can epoxy over a wood floor, but only if three conditions line up. First, your substrate needs to be stable, screwed down tight, and ideally plywood or OSB rather than old solid-plank hardwood. Second, the wood's moisture content needs to sit at or below about 10 percent, checked with a moisture meter before you open a single can. Third, you need the right layered system: a penetrating seal coat first, a flood coat second, and a UV-stable topcoat last.
Skip any one of those, and you're rolling the dice on:
- Delamination — the epoxy sheet peels away from boards that expand and contract with the seasons.
- Bubbling — trapped moisture and air outgas through the coating as it cures.
- Yellowing — untreated coatings amber and cloud within months under sunlight or UV bulbs.
If your floor is a stable, dry, well-prepped sheet good, epoxy over wood is a genuinely solid upgrade. If it's a 90-year-old oak floor that creaks in July and swells every spring, epoxy is fighting a losing battle against physics.
Key Takeaways
Epoxy over wood succeeds when the substrate is stable, moisture stays at or below 10 percent, and the seal coat, flood coat, and UV-stable topcoat go on in that exact order.
| Point | Details |
|---|---|
| Check substrate first | Screwed-down plywood or OSB holds up far better than old solid-plank hardwood. |
| Test moisture before mixing | Confirm a reading at or below 10 percent with a meter, checked in multiple spots. |
| Never skip the seal coat | Raw wood needs a penetrating sealer first or the flood coat will bubble. |
| Add a UV-stable topcoat | Polyaspartic or UV-resistant polyurethane prevents the yellowing plain epoxy develops. |
| Call a pro for bigger jobs | Showmeepoxy handles diamond-grinding prep, moisture mitigation, and warranty-backed installs across garages, basements, and patios. |
Table of Contents
- Is Your Wood Floor a Good Candidate for Epoxy?
- What Epoxy Products and Tools Do You Need?
- How Do You Apply Epoxy to a Wood Floor Step by Step?
- Why Did Your Epoxy Floor Bubble, Yellow, or Stay Sticky?
- When Should You Skip Epoxy on a Wood Floor?
- What Does a DIY Epoxy Wood Floor Project Actually Cost?
- What Do Professional Installers Do Differently Than DIYers?
- If You'd Rather Have a Pro Handle It
- Sources
Is Your Wood Floor a Good Candidate for Epoxy?
Not every wood floor deserves epoxy, and figuring that out before you buy a single gallon saves you a full weekend of regret. The best candidates are new, screwed-down plywood or OSB subfloors, or well-adhered engineered sheet goods that don't flex underfoot. The riskiest candidates are seasonal solid-plank hardwood, springy joists you can feel through your socks, or any board that's ever seen standing water.
Substrate stability is the single biggest factor in whether the coating survives, because rigid epoxy has zero tolerance for wood that swells and shrinks with humidity.
Before committing, run these three checks to avoid common installation pitfalls: avoiding common pitfalls.
- Walk the floor. Any bounce, squeak, or visible gap between boards signals a substrate that will crack a rigid coating.
- Test moisture with a meter. Pin-type or non-destructive meters both work; you want a reading at or under 10 percent before proceeding.
- Try a small test patch. Coat a two-foot square in a closet or under furniture, wait 48 hours, and check for bubbling, cloudiness, or peeling at the edges.
Pro Tip: Run the moisture check on three or four spots, not just one. A single reading near an exterior wall can look fine while the center of the room is holding more moisture than you think.
What Epoxy Products and Tools Do You Need?
Get your shopping list right before you touch the floor, because a mismatched product is the fastest way to waste a weekend. You need three distinct coating products, not one generic bucket of resin.
- Penetrating epoxy sealer for the first pass into raw wood grain, which blocks air pockets and tannins from bubbling up later.
- Two-part coating or bar-top epoxy for the structural flood coat that gives you thickness and depth.
- A UV-stable polyaspartic or UV-resistant polyurethane topcoat, since standard epoxy yellows under sunlight without one.
Reputable epoxy and marine-grade resin makers such as West System and MAS Epoxies both sell penetrating sealers and coating systems built specifically for wood substrates, which is worth knowing since not every "floor epoxy" on a shelf is formulated for porous surfaces.
For tools and consumables, gather: a floor sander with 60 to 120 grit paper for a graduated sanding sequence, a shop vacuum, tack rags, a moisture meter, mixing buckets, a drill-mounted mixing paddle, rollers, a squeegee, plastic sheeting, painter's tape, and a propane torch or heat gun for bubble popping.
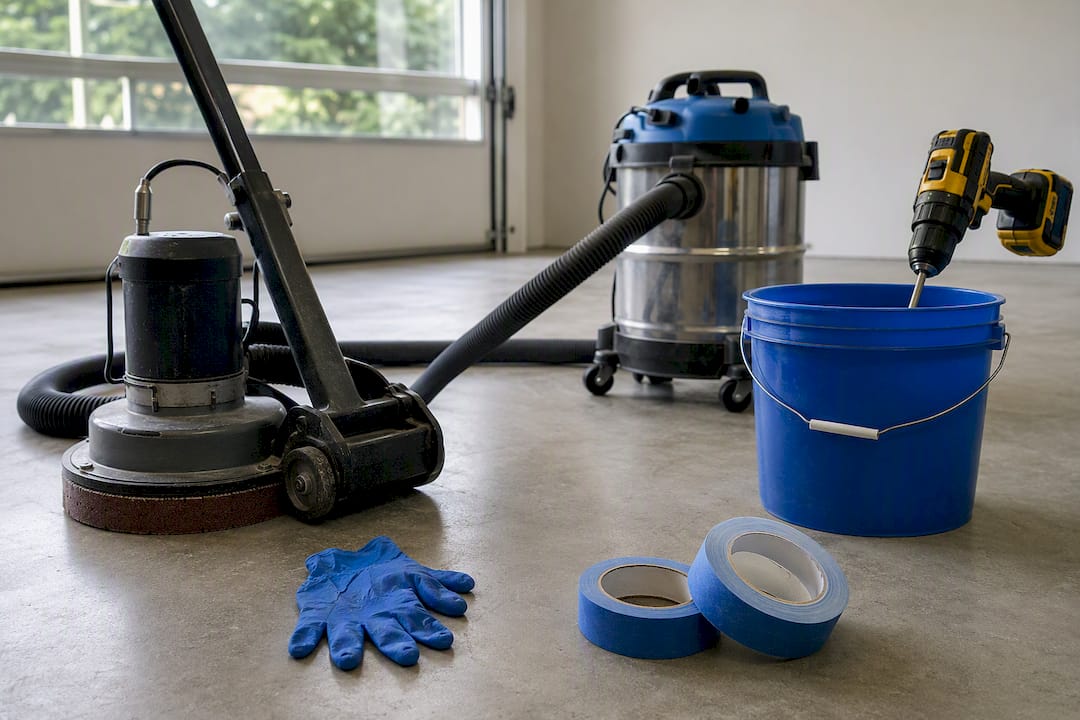
Pro Tip: Buy 15 to 20 percent more epoxy than your square footage calculator suggests. Underestimating and running out mid-pour is how you end up with a visible seam line across your floor.
Don't skip the personal protective equipment: nitrile gloves, safety glasses, and a respirator rated for organic vapors during both sanding and mixing. Keep windows open or fans running, and work in a room between 65 and 75 degrees Fahrenheit with humidity under 50 percent.
How Do You Apply Epoxy to a Wood Floor Step by Step?
This is where prep discipline pays off. Rush the seal coat or eyeball your mixing ratio, and you'll be troubleshooting a sticky floor instead of admiring a finished one.
- Stabilize the substrate. Screw down any loose boards, replace water-damaged sections, and confirm there's no flex when you walk the room.
- Strip to bare wood. Any existing finish, wax, or paint has to come off completely since epoxy won't bond reliably over old polyurethane or lacquer.
- Sand through the grits. Work from 60 grit up through 100 or 120, then vacuum thoroughly and wipe with a tack rag.
- Check moisture again. Confirm you're at or below that 10 percent threshold right before mixing anything.
- Fill gaps and fastener holes with a filler compatible with your epoxy system so you don't create air pockets under the coating.
- Mix and apply the seal coat. Use a thin, even application worked into the grain with a brush or roller. Skipping this step on raw wood is the single most common cause of bubbles once the flood coat goes on. Let it reach its recoat window, tacky to the touch but not fully cured, typically a few hours depending on room temperature.
- Mix the flood coat using the double-cup method. Pour resin and hardener into one cup, then transfer to a second cup and mix again. This second transfer catches unmixed material clinging to the bucket walls, which is the usual culprit behind soft, sticky patches.
- Pour and spread in small batches, targeting roughly an eighth-inch wet film thickness, and keep a wet edge as you work across the room so sections don't lap and show seams.
- Torch the surface immediately to pop surface bubbles, then pass again about ten minutes later before the epoxy starts to gel. Keep the flame moving; lingering in one spot scorches the finish.
- Apply the UV-stable topcoat once the flood coat is fully cured, choosing a polyaspartic or UV-resistant polyurethane to guard against amber discoloration under sunlight.
Expect the flood coat to be tack-free within 24 hours, safe for light foot traffic in 48 to 72 hours, and fully cured for furniture and heavy use after about a week, though exact timing depends on your product and room temperature.
Why Did Your Epoxy Floor Bubble, Yellow, or Stay Sticky?
Most failures trace back to one of five root causes, and matching the symptom to the cause tells you how bad the fix will be.
- Bubbling usually means moisture outgassing through the wood, often from skipping the seal coat or applying over wood above the moisture threshold.
- Contamination spots where the coating fisheyes or won't bond come from leftover oil, wax, or silicone residue that sanding alone didn't remove.
- A sticky, soft cure almost always points to an incorrect mixing ratio or inadequate mixing time.
- Yellowing develops from UV exposure hitting a coating with no UV-stable topcoat.
- Cracking or delamination along board seams signals wood movement the coating couldn't flex with.
The fix depends on severity. Surface scratches just need light sanding and a fresh topcoat pass. Small bubbles or minor dullness call for a sand-and-recoat. But a sticky cure or adhesion failure across a large area means stripping back to bare wood and reinstalling, since uncontrolled mixing ratios and moisture are the variables professionals flag most often as root causes of total failures. If you're staring at lifted sheets or a floor that never fully hardened, that's the point to call in a professional rather than keep layering fixes on a failed base.
When Should You Skip Epoxy on a Wood Floor?
Some floors just aren't worth the fight. Skip epoxy entirely if you're dealing with:
- Old, wide-plank solid hardwood that visibly gaps or cups with the seasons.
- Persistent moisture issues, like a crawlspace floor that never dries below threshold.
- Springy, unsupported subfloors that flex noticeably underfoot.
- Sunlit rooms where you're not committed to a UV-stable topcoat plan.
In those cases, a quality polyurethane finish respects wood's natural movement better than a rigid epoxy shell. Installing a new plywood or OSB subfloor first is another route if you're set on epoxy specifically. And for faster return-to-service with better UV tolerance, a polyaspartic system is often the more forgiving choice over standard epoxy.
What Does a DIY Epoxy Wood Floor Project Actually Cost?
Budget matters here as much as technique. For a typical DIY job, expect to spend on:
- Materials: penetrating sealer, coating epoxy, UV-stable topcoat, wood filler, and consumables like rollers and mixing cups.
- Tool rental: a floor sander and moisture meter if you don't already own them.
- Waste buffer: plan for 15 to 20 percent extra material to cover uneven spreading and mixing loss.
A mixed gallon of coating epoxy generally covers enough floor area for an eighth-inch flood coat, though exact coverage varies by product and how much you're filling low spots. Timeline-wise, budget one to two days for prep and sanding, a day for the seal coat with its recoat window, a day for the flood coat and bubble removal, and another day for the topcoat, with several more days of light cure before heavy use. Professional installation costs more upfront but compresses that timeline considerably and adds warranty coverage you won't get doing it yourself.
What Do Professional Installers Do Differently Than DIYers?
Professionals aren't just faster, they're controlling variables a DIYer often can't see. Precision batch mixing, moisture mitigation systems, and climate-controlled curing environments separate a warrantied installation from a weekend project.
- Diamond-grinding surface prep opens the wood or substrate pores more consistently than a rented orbital sander.
- Calibrated mixing equipment removes the guesswork double-cup mixing tries to solve by hand.
- Industrial primers and flexible topcoat systems are chosen specifically to handle substrate movement DIYers often don't anticipate.
Professionals repeatedly point to the same handful of variables, mixing ratio, temperature, and moisture control, as the difference between a floor that lasts a decade and one that fails within a year. Getting all three right consistently is why large floor projects are frequently left to trained installers rather than tackled solo.
A Quick Note From the Author
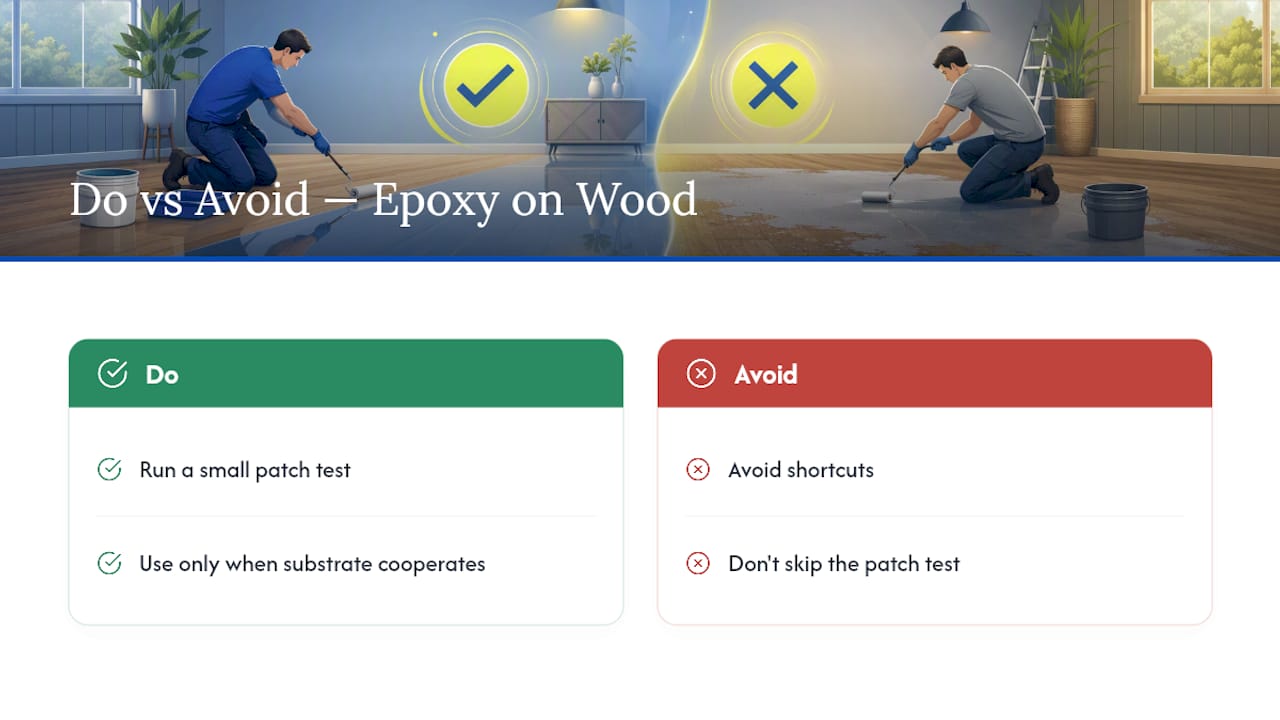
My honest read after digging into this: epoxy over wood works well when the substrate cooperates, but it punishes shortcuts more than almost any other flooring project I've researched. Run the small patch test before you commit to the whole room.
If You'd Rather Have a Pro Handle It
Reading through all those moisture thresholds, mixing ratios, and torch timing windows, you might decide your Saturday is worth more than the savings. That's a reasonable call, and it's exactly the gap Showmeepoxy fills for homeowners in Mid-Missouri.

Where a DIY attempt hinges on getting sanding, moisture readings, and mixing ratios right on the first try, Showmeepoxy starts every job with diamond-grinding surface prep that opens the substrate more evenly than a rented sander ever will, then backs the installation with moisture mitigation and a warranty most homeowners can't self-issue. We install epoxy and polyaspartic systems for garages, basements, patios, and commercial spaces, and our polyaspartic topcoats handle UV exposure without the yellowing risk this guide keeps flagging. If you're weighing DIY against hiring out, run your numbers through our free cost calculator or request a quote and see what a warrantied install actually costs against a weekend of your own labor.
Sources
- How to Apply Epoxy Wood Finish
- Epoxy Over Wood Floors: A Practical Guide to Durable Coatings
- Epoxy Over Wood Floor: Can You Do It and How
- Complete Guide to Buying and Using Epoxy for Woodworking - Rockler
- 5 things to consider before installing epoxy flooring