
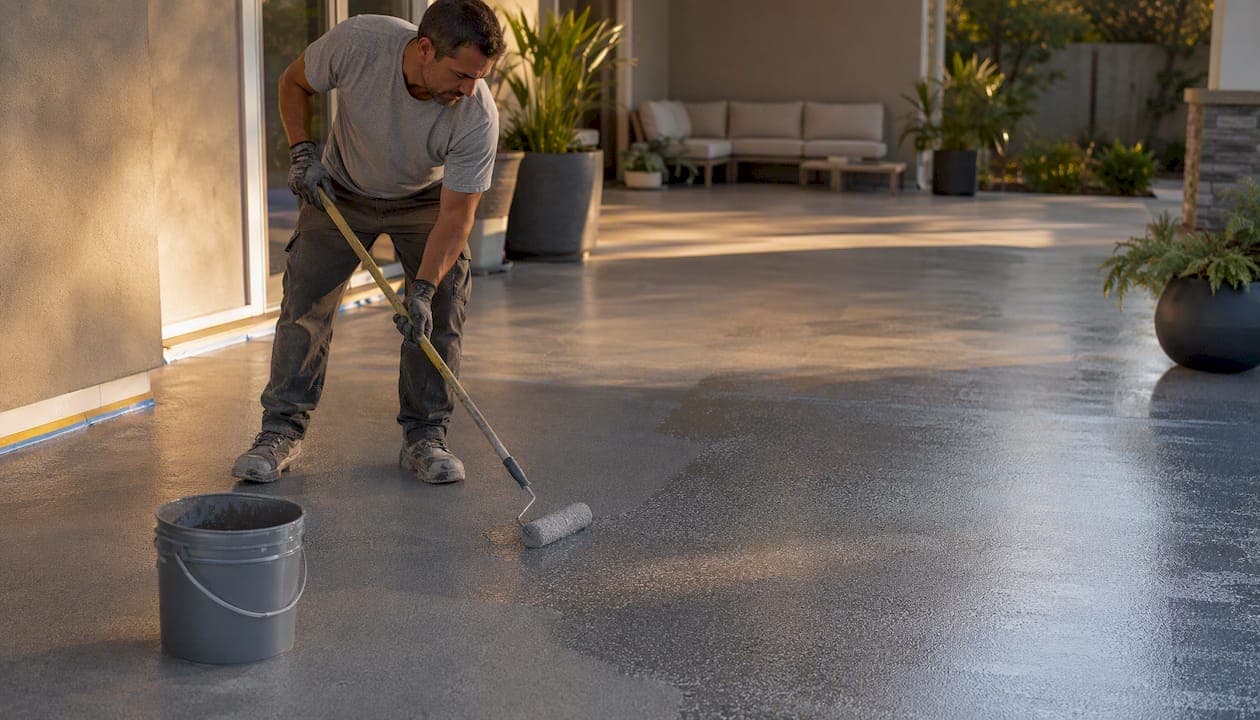
Epoxy works on a patio, but only as part of a system. A standalone interior-grade epoxy will yellow and chalk under direct sun within a season or two. Pair that epoxy base with a UV-stable topcoat, aliphatic polyurethane or polyaspartic, and you get a floor that holds color and resists weather for years. A full polyaspartic system alone is another solid route, especially where cure speed matters.
Here's the quick breakdown for outdoor projects:
- Choose an epoxy base plus UV-stable topcoat if you want the decorative flake or color options epoxy is known for, applied at a lower material cost than a full polyaspartic build.
- Choose a full polyaspartic or polyurea system if you need fast cure times, better UV resistance out of the gate, and more flexibility in cold climates.
- Choose a penetrating sealer or stain if the slab is in rough shape, your budget is tight, or you just want to enhance the concrete rather than build a thick coating system.
Pro Tip: If a product listing doesn't mention "UV-stable" or "aliphatic" anywhere on the label or datasheet, assume it's an interior formula. Interior epoxy left bare outdoors typically yellows within one or two seasons and can start delaminating within a few years, according to installer field reports from NJ Epoxy Flooring.
The bigger risk factors to flag before you commit: UV exposure without a proper topcoat causes yellowing and chalking, a bare epoxy surface can turn dangerously slick when wet, and freeze-thaw cycling stresses any rigid coating that isn't formulated for flexibility. None of these are dealbreakers. They're just the variables that decide which product category you should actually buy.
Key Takeaways
Outdoor patio coatings only perform long-term when the base epoxy is paired with a UV-stable topcoat or replaced with a full polyaspartic system, and prep decides whether either one lasts.
| Point | Details |
|---|---|
| Topcoat is non-optional | Bare epoxy yellows and chalks in sun; pair it with aliphatic polyurethane or polyaspartic for UV stability. |
| Prep drives lifespan | Diamond grinding creates a stronger bond than acid etching and is the top cause of premature failure when skipped. |
| Match system to climate | Freeze-thaw regions and poolside areas favor full polyaspartic systems over standard epoxy-only builds. |
| Check the datasheet, not the label | Verify UV stability, elongation, and recoat window before buying any outdoor kit. |
| Professional installs reduce risk | Showmeepoxy pairs diamond-grind prep with industrial-grade epoxy and polyaspartic topcoats for outdoor patios in Mid-Missouri. |
Table of Contents
- Comparing Coating Types for Outdoor Patios
- When Should You Choose Epoxy Over Other Systems?
- How Do You Apply an Outdoor Epoxy System Step by Step?
- Why Surface Prep Determines Whether Your Patio Coating Lasts
- How Long Does a Patio Epoxy Coating Actually Last?
- What Does It Cost to Coat a Patio With Epoxy?
- What Safety Gear and Weather Conditions Matter Most?
- What Should You Check Before Buying an Outdoor Epoxy Product?
- What Do Professional Installers Do Differently?
- What Do Installers Learn From Outdoor Patio Jobs?
- Get Your Patio Coated Right the First Time
- Sources
Comparing Coating Types for Outdoor Patios
Epoxy isn't the only option, and it isn't always the best one. Four coating categories dominate the outdoor concrete market, and each behaves differently once it's baking in July sun or getting hit with de-icing salt in January.
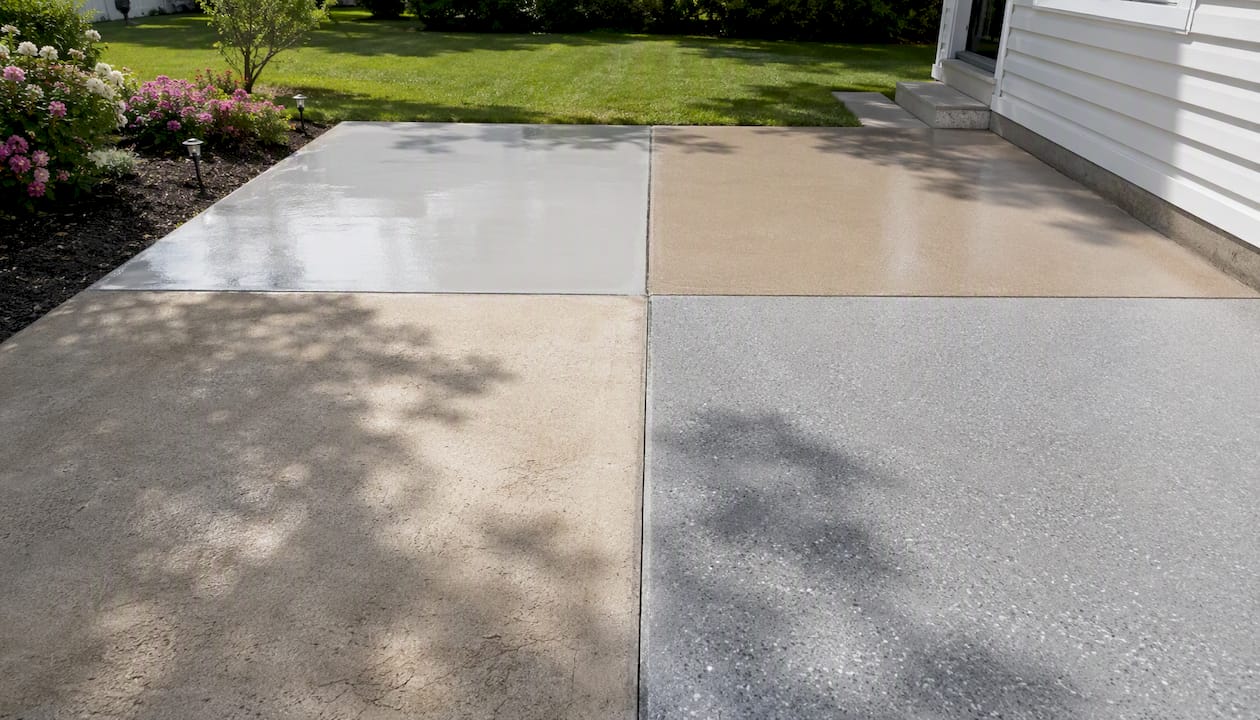
Epoxy (as a base coat) bonds aggressively to properly prepped concrete and resists chemicals and abrasion better than almost anything else in this list. On its own, it has poor UV tolerance. That's why outdoor-rated epoxy systems always layer it under something else.
Polyaspartic cures fast, often returning a surface to light foot traffic within hours rather than days, and it holds up well to UV exposure on its own. It costs more per gallon than epoxy but needs fewer coats and less downtime, which can offset the price difference on a tight project schedule.
Aliphatic polyurethane is the topcoat of choice when UV stability and flexibility both matter. It's typically applied thin, over an epoxy or polyaspartic base, and its job is almost entirely about protecting the color and surface underneath from sun degradation.
Penetrating sealers and stains don't build a film the way coatings do. They soak into the concrete, enhance the existing surface, and offer far less abrasion resistance. For a patio with heavy furniture traffic or grill use, a sealer alone usually isn't enough protection. For a low-traffic decorative slab, it can be the smarter, cheaper move.
| Coating Type | Best For | UV/Color Stability | Abrasion/Chemical Resistance | Cure Time | DIY Difficulty | Typical Cost Shape |
|---|---|---|---|---|---|---|
| Epoxy base + UV topcoat | Sun-exposed patios wanting color/flake options | High (with topcoat) | High | 3–7 days full cure | Moderate to hard | Mid-range |
| Full polyaspartic system | High-traffic, poolside, fast turnaround needs | High | High | Hours to 1–2 days | Moderate | Higher material cost, less labor time |
| Aliphatic polyurethane topcoat | Any exterior system needing UV protection | High | Moderate to high | 24 hours | Moderate | Add-on cost to base system |
| Penetrating sealer/stain | Shaded or low-traffic decorative slabs | Moderate | Low to moderate | Same day to 24 hours | Easy | Lowest |
A few things stand out once you line these up side by side. Epoxy alone is never the finish coat outdoors, it's always the base. Polyaspartic earns its higher price tag through speed, not just performance. And sealers are the right call more often than most homeowners assume, especially on patios that just need a refresh rather than a heavy-duty rebuild.
When Should You Choose Epoxy Over Other Systems?
The right coating depends on four things: how much sun the patio gets, how often the ground freezes and thaws, how much moisture is coming up through the slab, and how the space actually gets used.
- Sun-exposed patio with furniture and grill traffic: an epoxy base with an aliphatic polyurethane or polyaspartic topcoat handles the UV load and the abrasion from dragged chairs and dropped charcoal.
- Poolside patio: favor a full polyaspartic system. It cures fast, tolerates splashed pool chemicals well, and can be broadcast with slip-resistant aggregate for wet-foot traffic.
- Shaded backyard patio with light use: a penetrating sealer or stain often does the job for less money, since UV degradation isn't the primary threat here.
- Freeze-thaw climate (northern states, mountain regions): lean toward polyaspartic or polyurea, or at minimum confirm the epoxy system uses a flexible topcoat rated for temperature swings. Rigid coatings crack faster when the slab underneath expands and contracts.
- Slab with known moisture issues: address that first with proper testing and mitigation before any coating goes down, regardless of which product you pick.
If you want decorative flake blends or a metallic look, epoxy remains the stronger creative option. Polyaspartic systems can carry flake too, but the color and effect options are typically narrower. So the decision often comes down to this: pick epoxy-based systems when aesthetics and mid-range budget matter most, and pick full polyaspartic when speed, poolside chemical exposure, or cold-climate flexibility top your list.
How Do You Apply an Outdoor Epoxy System Step by Step?
The order of operations matters more outdoors than indoors, because weather windows are less forgiving and mistakes show up faster in direct sun.
- Inspect and test the slab. Check for cracks, spalling, and moisture. A simple plastic-sheet moisture test (tape a square of plastic to the concrete overnight and check for condensation) gives a rough read; a calcium chloride test gives a more precise one.
- Clean thoroughly. Degrease, pressure wash, and let the slab dry completely. Any oil or efflorescence left behind becomes a bond failure point.
- Mechanically prep the surface. Diamond grinding opens the concrete pores for maximum adhesion. Acid etching is a cheaper DIY alternative but produces a shallower profile and weaker long-term bond.
- Repair cracks and low spots. Fill and level before coating, never after. Coatings telegraph every flaw in the substrate.
- Apply a primer or bond coat if the manufacturer's datasheet calls for one, especially on porous or older concrete.
- Mix and apply the epoxy base coat. Follow the ratio on the label exactly, typically a 2:1 or 3:1 resin-to-hardener mix, and work in sections small enough to finish before the pot life expires.
- Broadcast aggregate (colored flake or slip-resistant sand) into the wet base coat if you want texture or decorative effect.
- Let the base cure fully before topcoating, usually 24 hours minimum depending on temperature.
- Apply the UV-stable topcoat (aliphatic polyurethane or polyaspartic), which is the layer actually protecting your color and finish from sun damage.
- Allow final cure before foot traffic, and longer before furniture or heavy use resumes.
Tools and materials checklist:
- Diamond grinder or angle grinder with diamond cup wheel (rental or contractor-owned)
- Shop vacuum with HEPA filtration for dust control
- Mixing paddle and drill, plus graduated mixing buckets for accurate ratios
- Notched squeegee and 3/8-inch nap rollers
- Moisture test kit (plastic sheet or calcium chloride)
- Full PPE set: respirator, chemical-resistant gloves, safety glasses, knee pads
Common mistakes that ruin outdoor jobs:
- Applying epoxy when the slab or air temperature is outside the manufacturer's recoat window, which causes poor leveling or a tacky, uncured film.
- Skipping the moisture test and coating over a slab that's still pushing vapor, which leads to bubbling and delamination within months.
- Mixing epoxy off-ratio "by eye" instead of measuring, which produces soft spots that never fully harden.
- Rushing the recoat window between base and topcoat, which can cause poor intercoat adhesion.
Why Surface Prep Determines Whether Your Patio Coating Lasts
Almost every early coating failure traces back to one thing: the concrete wasn't opened up enough for the epoxy to actually bond to it. Prep isn't a step you rush to get to the fun part. It's the part that decides whether the fun part lasts five years or fifty.
Diamond grinding removes laitance (the weak, dust-like top layer of concrete) and creates a mechanical profile that epoxy can grip. It's the method professional installers rely on because it produces the most consistent bond, works on nearly any slab condition, and doesn't introduce moisture the way etching does.
Acid etching is the budget DIY alternative. It uses a muriatic acid solution to lightly dissolve the surface and create texture. It works, but the profile is shallower and less consistent, and it introduces liquid into the slab that needs to fully neutralize and dry before coating.
Shot blasting is a commercial-grade option, typically reserved for large slabs or industrial jobs, that combines aggressive profiling with dust containment. It's rarely a homeowner DIY choice given the equipment cost.
Repair checklist before any coating goes down:
- Fill hairline and structural cracks with an appropriate epoxy or polyurethane crack filler.
- Address spalling (surface flaking or pitting) by grinding out damaged areas and patching level.
- Level low spots so water doesn't pool on the finished coating.
- Run a moisture test, either an in situ relative humidity probe or a calcium chloride test, especially on older or ground-level slabs.
Pro Tip: Diamond grinding is what separates a coating that lasts from one that peels in year two. It's why professional installers default to it over acid etching whenever possible. Grinders are rentable, but for anything larger than a small patio, the learning curve and dust management make hiring a contractor the more reliable move. Read more on why grinding concrete before epoxy matters if you're weighing the rental route yourself.
How Long Does a Patio Epoxy Coating Actually Last?
Lifespan depends almost entirely on which system you installed and how well the prep was done, not just on the epoxy itself.
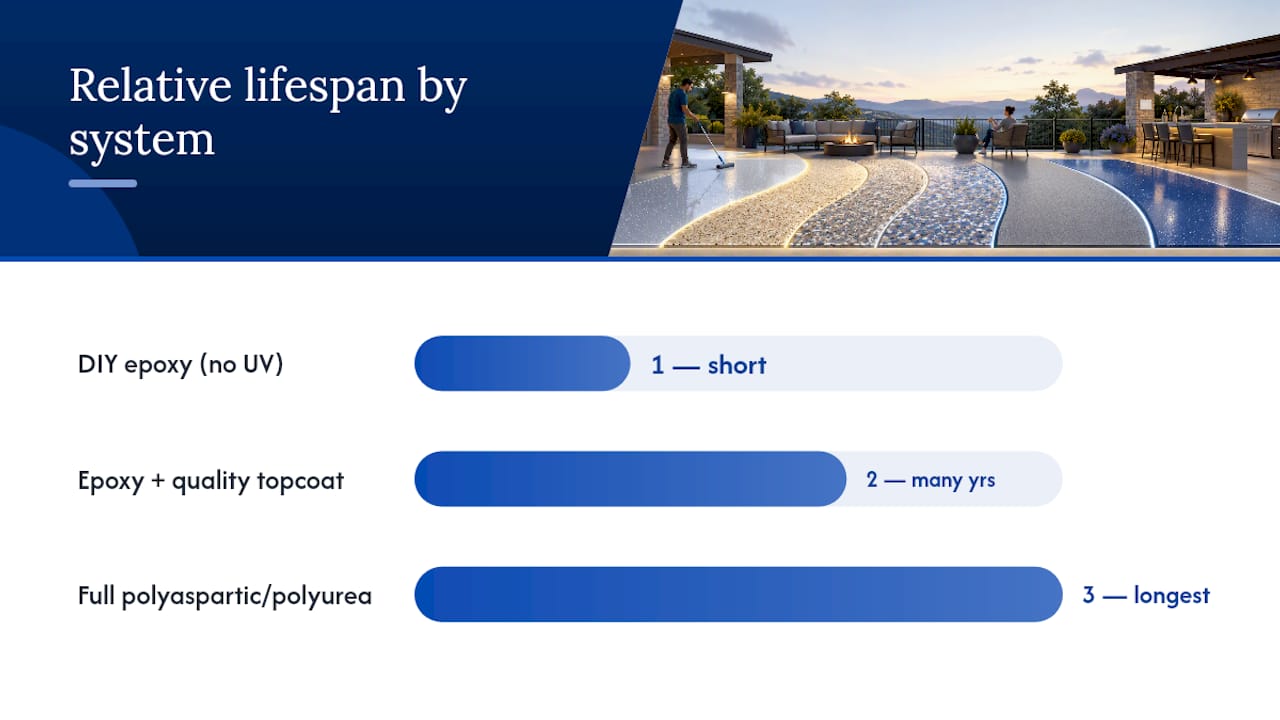
A basic DIY epoxy system without a proper UV topcoat is the shortest-lived option, often showing yellowing within a season or two and needing a full recoat within a few years, based on installer observations from outdoor concrete coating specialists. An epoxy base paired with a quality aliphatic or polyaspartic topcoat, installed with proper diamond-ground prep, typically performs for many years with normal fading eventually calling for a topcoat refresh rather than a full teardown. A full polyaspartic or polyurea system tends to hold color and flexibility the longest in harsh climates, since the chemistry itself is engineered for exterior exposure from the start.
Routine maintenance checklist:
- Sweep or rinse debris regularly, since grit trapped under furniture legs can scratch the topcoat over time.
- Inspect annually for chalking, edge lifting, or hairline cracking, especially after the first winter.
- Touch up high-wear zones (entry points, grill area) with a compatible topcoat before wear reaches the base coat.
- Avoid harsh solvents or ammonia-based cleaners that can dull the topcoat's sheen.
Watch for three warning signs specifically. UV chalking (a powdery white residue on the surface) signals the topcoat is breaking down and needs refreshing before it exposes the base coat underneath. Edge lifting at the perimeter usually points to a moisture or adhesion problem from the original prep. Delamination (visible bubbling or peeling in sheets) is the most serious sign and typically means a section needs to be ground out and redone rather than patched.
What Does It Cost to Coat a Patio With Epoxy?
Material-only DIY kits for a basic epoxy system typically run on the lower end per square foot, covering the base coat and a topcoat if the kit includes one. That range excludes tools, PPE, and any concrete repair. Professional installation, which bundles diamond grinding, industrial-grade materials, labor, and often a UV-stable topcoat, runs higher per square foot but includes prep work most DIYers underestimate the cost and time of.
What moves the price:
- Slab condition. Extensive crack repair or spalling adds material and labor time.
- Moisture mitigation. A slab that fails a moisture test may need a vapor-mitigation primer, which adds cost.
- Decorative options. Flake blends, metallics, and multi-color designs cost more than a solid color.
- Topcoat choice. Polyaspartic topcoats generally cost more per gallon than aliphatic polyurethane but reduce labor time.
- Labor rates and minimums. Many contractors have a minimum project charge that makes very small patios less cost-efficient per square foot.
Worked example: a 200 sq ft patio. At a typical coverage rate of roughly 150 to 200 square feet per gallon per coat, a 200 square foot patio usually needs one to two gallons of base coat and a similar volume of topcoat, depending on desired thickness and whether aggregate is broadcast. Add crack filler and primer as needed based on slab condition. Run your own numbers with Showmeepoxy's free cost calculator to get a project-specific estimate before you buy materials.
What Safety Gear and Weather Conditions Matter Most?
Outdoor coating work carries real chemical exposure risk, and weather windows are less forgiving than an indoor garage job where you control the climate.
PPE checklist:
- A properly rated respirator (not just a dust mask) for solvent-bearing topcoats
- Chemical-resistant gloves rated for epoxy and polyaspartic components
- Safety glasses or goggles during mixing and pouring
- Knee pads for extended time working at ground level
- Adequate ventilation, even outdoors, since some polyaspartic and polyurethane topcoats carry stronger solvent odors than water-based epoxy
Keep children and pets off the surface for the full cure window, not just until it looks dry to the touch. Dispose of mixed leftover material according to the product's safety data sheet rather than pouring it down a drain, since cured epoxy and polyaspartic waste needs to be handled as solid, not liquid, waste in most municipalities.
What Should You Check Before Buying an Outdoor Epoxy Product?
Walk into this purchase with a checklist, not a gut feeling based on the label's marketing copy.
- UV stability chemistry. Confirm the topcoat is aliphatic, not aromatic. Aromatic polyurethanes yellow in sunlight; aliphatic ones don't.
- Recommended thickness. Compare the datasheet's mil thickness recommendation against what a single coat actually achieves at the stated coverage rate.
- Slip-resistance options. Look for compatible aggregate or additive blends if the patio will get wet, especially near a pool.
- Cure time and recoat window. A narrow recoat window means less flexibility if weather delays your schedule.
- Coverage per gallon. This determines how many gallons you actually need, which is where a lot of DIYers underbuy and end up with a thin, under-protected coat.
- VOC content. Matters both for indoor storage and for local regulations in some areas.
- Freeze-thaw flexibility. Especially relevant if you're in a climate with real winters.
On the datasheet specifically, look past the front-of-label claims and check: UV stability rating, elongation or flexibility percentage, adhesion strength (measured in PSI pull-off tests), pot life, and the recoat window in hours. Retail listings for products like general "epoxy coating for outdoor concrete patio" searches show a wide range of consumer kits, and not all of them are formulated for prolonged sun exposure, so verifying exterior-rated chemistry against the datasheet matters more than trusting the packaging.
For sourcing and comparison, hardware retailers like KILZ and PanSeal-branded product lines are common starting points for homeowners researching exterior concrete coatings, and Doheny's is a frequently cited supplier for pool-deck and patio-specific coating kits given its focus on poolside surfaces. Cross-reference whatever you find against the datasheet checklist above rather than assuming any retail listing is automatically exterior-rated. In terms of product categories, most homeowners land on either an epoxy base with a polyaspartic or aliphatic polyurethane topcoat, or a full polyaspartic system if speed and cold-weather flexibility top the priority list.
What Do Professional Installers Do Differently?
A contractor's process usually front-loads more prep and testing than a typical DIY plan, which is exactly where the durability difference comes from.
Where professional installation earns its cost:
- Diamond grinding as standard practice rather than an optional upgrade, producing a more consistent bond across the whole slab
- Moisture testing and mitigation built into the process, catching vapor problems before they become bubbling six months later
- Industrial-grade primers and topcoats not always available at retail
- Warranty offerings that protect the homeowner if something fails
- Consistent thickness control across the whole surface, avoiding the thin spots common in DIY rolling
- Faster turnaround with polyaspartic systems, sometimes finishing a patio in a single day where a DIY epoxy project stretches across a weekend plus cure time
When hiring a pro makes the most sense:
- Large patios where consistent mixing and application across hundreds of square feet is hard to manage alone
- Slabs with known moisture or structural issues that need professional-grade mitigation
- High-sun, poolside, or high-traffic areas where failure risk and consequences are highest
- Homeowners who want a warranty or a guaranteed finish rather than a learn-as-you-go project
A typical professional workflow runs: inspect the slab, run a moisture test, diamond-grind the surface, apply an industrial-grade epoxy base, broadcast aggregate for texture or color, then finish with a UV-stable topcoat. It's the same sequence a capable DIYer follows, just executed with commercial equipment and tighter quality control at each step. Before hiring anyone, checking a contractor's standing on a resource like the Better Business Bureau can surface complaint patterns or warranty disputes worth knowing about ahead of time.
What Do Installers Learn From Outdoor Patio Jobs?
Years of outdoor installs teach a few lessons that rarely show up in a product's marketing copy.
- Failed prep is the single most common cause of callbacks. Slabs that were etched instead of ground, or grease that wasn't fully degreased, show up as adhesion failure within the first year.
- Moisture is the silent killer. A slab that seems dry to the touch can still be pushing enough vapor to blister a coating from underneath, which is why a real moisture test beats a visual guess every time.
- Homeowners often underestimate how much the topcoat matters. Many assume "epoxy" is the whole system, when the topcoat is actually doing most of the UV and weather work.
- Climate-specific adjustments matter. Freeze-thaw regions need more flexible topcoats, while hot, humid climates need faster attention to pot life and recoat windows before material starts kicking off too fast.
Questions worth asking any contractor before signing a contract:
- What moisture testing method do you use, and what happens if the slab fails it?
- What warranty do you offer, and what specifically voids it?
- What exact products and topcoat chemistry are you using, and can I see the datasheet?
- What prep method are you using, diamond grinding or acid etching, and why?
- What's the expected cure time before I can use the patio again?
Get Your Patio Coated Right the First Time
Showmeepoxy handles outdoor patio coatings the same way it handles every floor: diamond-grind the surface first, then build a system designed to actually survive weather instead of just looking good on install day. That means industrial-grade epoxy bases paired with UV-stable polyaspartic or aliphatic topcoats, slip-resistant finish options for poolside and high-traffic areas, and a turnaround timeline that doesn't leave your patio unusable for a week.

Local homeowners across Mid-Missouri work with Showmeepoxy because the surface prep is the part most DIY projects and even some competitors skip, and it's the part that decides whether a patio coating lasts five years or fifteen. Whether you're weighing an epoxy-based system or leaning toward a full polyaspartic install, a free estimate gets you a real answer instead of a guess. Visit the patio and outdoor coatings page or run your numbers through the cost calculator to see what your project looks like, then reach out for a free, no-pressure quote.
Sources
Manufacturer technical datasheets carry more weight than star ratings or review counts, because they list the actual performance specs your project depends on rather than a buyer's general impression.
- Epoxy Floor for Outdoor Patio: UV-Resistant Coatings for Concrete – Floor Chem Depot
- Epoxy Coating For Outdoor Concrete Patio – Amazon search results
A retail listing can claim "outdoor-ready" without backing it up, while a datasheet has to state its actual UV and adhesion performance in measurable terms. That gap is exactly why verifying exterior-rated chemistry against the technical specs, not the marketing language, is the habit that saves homeowners from a coating that fails in year two instead of year twelve.