
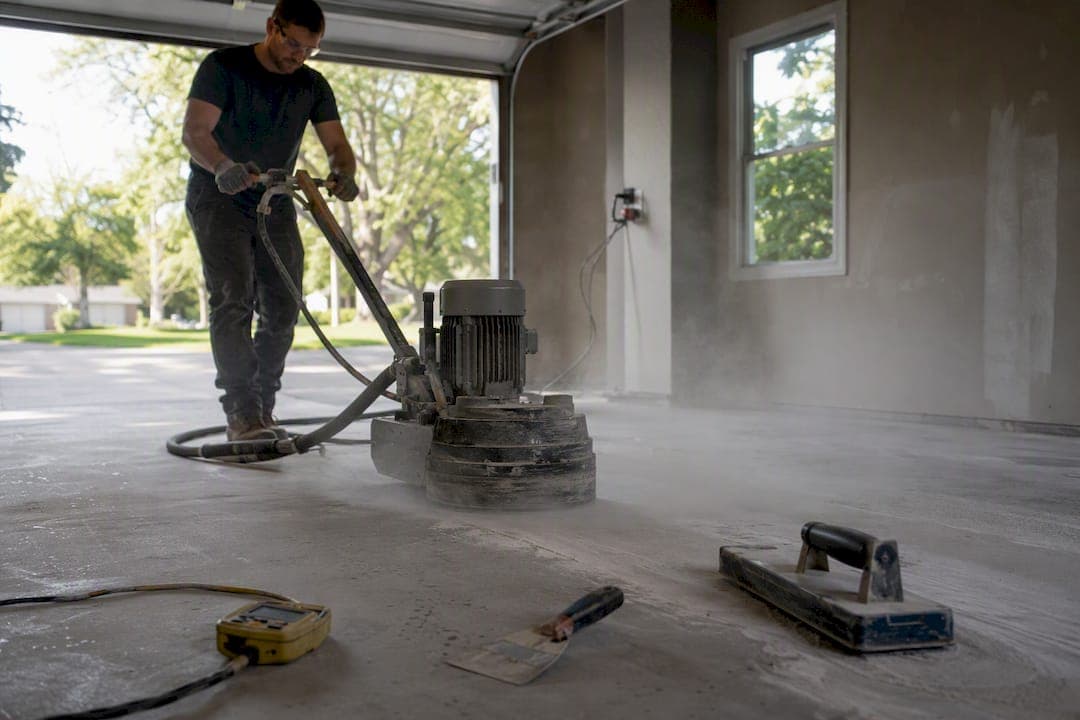
For most garage and concrete floors, polyaspartic is the better choice as a topcoat: it resists UV yellowing, cures fast enough to finish in a day or two, and holds color and gloss for years. Pure polyurea earns its keep in specialty roles like crack bridging and heavy-impact base layers. The real difference-maker isn't the chemistry label at all. It's surface prep and installer skill.
TL;DR:
- Proper surface preparation and skilled installation are crucial, as both materials bond poorly to unground, dusty slabs.
- Polyaspartic offers a longer working window and stronger UV stability, making it ideal for residential topcoats exposed to sunlight.
- Polyurea's high elongation provides superior crack bridging and impact absorption in heavy-traffic or structural concrete applications.
- Costs range from $5 to $12 per square foot, with faster curing polyaspartic typically offering better long-term value despite higher initial prices.
- Combining a flexible polyurea or epoxy base with a UV-stable polyaspartic topcoat is a common strategy for durable, attractive residential floors.
Table of Contents
- Polyurea vs Polyaspartic Coatings: Quick Comparison
- Why Do Polyurea and Polyaspartic Cure So Differently?
- How Do Polyurea and Polyaspartic Perform Over Time?
- Will My Floor Turn Yellow? UV Stability Compared
- What Does a Polyaspartic or Polyurea Installation Actually Involve?
- What Do Polyurea and Polyaspartic Floors Cost Long-Term?
- Can You Combine Polyurea and Polyaspartic in One System?
- How to Choose the Right Coating for Your Floor
- The Show Me Epoxy Approach to Polyurea and Polyaspartic Systems
- An Honest Take on the Polyurea vs Polyaspartic Debate
- Get a Free Estimate on Your Garage Floor Coating
- Sources
Polyurea vs Polyaspartic Coatings: Quick Comparison
Homeowners rarely need a chemistry degree to make this call. They need to know what each material does on their actual floor, under their actual truck tires.
Here's the practical breakdown:
- Cure time: Pure polyurea gels in seconds and hardens fast; polyaspartic typically offers a 15 to 40 minute working window, then cures to walk-on hardness within hours.
- UV stability: Polyaspartic (an aliphatic polyurea variant) resists yellowing outdoors; standard aromatic polyurea can yellow under sun exposure over time.
- Flexibility: Polyurea flexes more, making it better at bridging hairline cracks and absorbing impact.
- Adhesion: Both bond well to properly prepped concrete, but neither forgives a dusty, unground slab.
- Application method: Pure polyurea usually requires heated plural-component spray rigs; polyaspartic is often roll, brush, or squeegee friendly for professional crews.
- Cost range: Both sit above basic epoxy, generally in the $5 to $12 per square foot installed range.
- Typical role: Polyurea often serves as a tough base layer or membrane; polyaspartic usually finishes the job as the visible topcoat.
Here's something worth clearing up: "polyaspartic" isn't a competing material to polyurea. It's a subtype of polyurea built from aspartic ester resins instead of standard amines. That's why you'll see it marketed separately, even though the two share the same chemical backbone.
As for DIY viability: pure polyurea is essentially off the table for a weekend warrior since it demands commercial spray equipment. Polyaspartic, in the right formulation, is far more forgiving, though a professional install still outperforms a garage-kit job on return-to-service time and finish quality.
Why Do Polyurea and Polyaspartic Cure So Differently?
The working-window gap between these two materials isn't a marketing choice. It's basic chemistry, and it explains almost everything else in this comparison.
Pure polyurea forms when an isocyanate reacts with an amine. Amines are aggressive, fast-reacting molecules, so the reaction happens almost instantly. That's why pure polyurea gel times run in seconds, not minutes. There's no time to pour it from a bucket and roll it out. It has to be sprayed through a heated, plural-component rig that mixes the two parts at the gun tip, under pressure, the instant before it hits the floor.
Polyaspartic tweaks that same reaction. Instead of a raw amine, it uses an aspartic ester, a bulkier molecule that sterically blocks the isocyanate from reacting instantly. The result is a controllable pot life, commonly 15 to 40 minutes, long enough for a crew to mix a batch, pour it, and squeegee it across a two-car garage before it starts kicking off.
That gap in reaction speed governs everything downstream. Humidity accelerates isocyanate reactions somewhat, so both chemistries are more temperature and moisture sensitive than epoxy, but polyaspartic's slower reaction gives installers more room to adjust for a humid afternoon. Gel time also dictates the tools: a hindered chemistry that gives you half an hour to work is roll-and-brush friendly. A chemistry that sets in ten seconds is not.
This is why pure polyurea rarely shows up as a homeowner DIY project, and why polyaspartic kits (imperfect as they are compared to a professional multi-coat system) can actually work in a driveway.
How Do Polyurea and Polyaspartic Perform Over Time?
Chemistry sets the rules, but performance is where the choice actually shows up under your feet, and under your tires.
Polyurea's biggest advantage is elongation. It stretches significantly before it tears, which means it bridges hairline cracks in a slab and absorbs impact from dropped tools or a jack stand shifting under load. That flexibility is why polyurea shows up in crack-bridging membranes and joint fill far more often than as a decorative topcoat on its own.
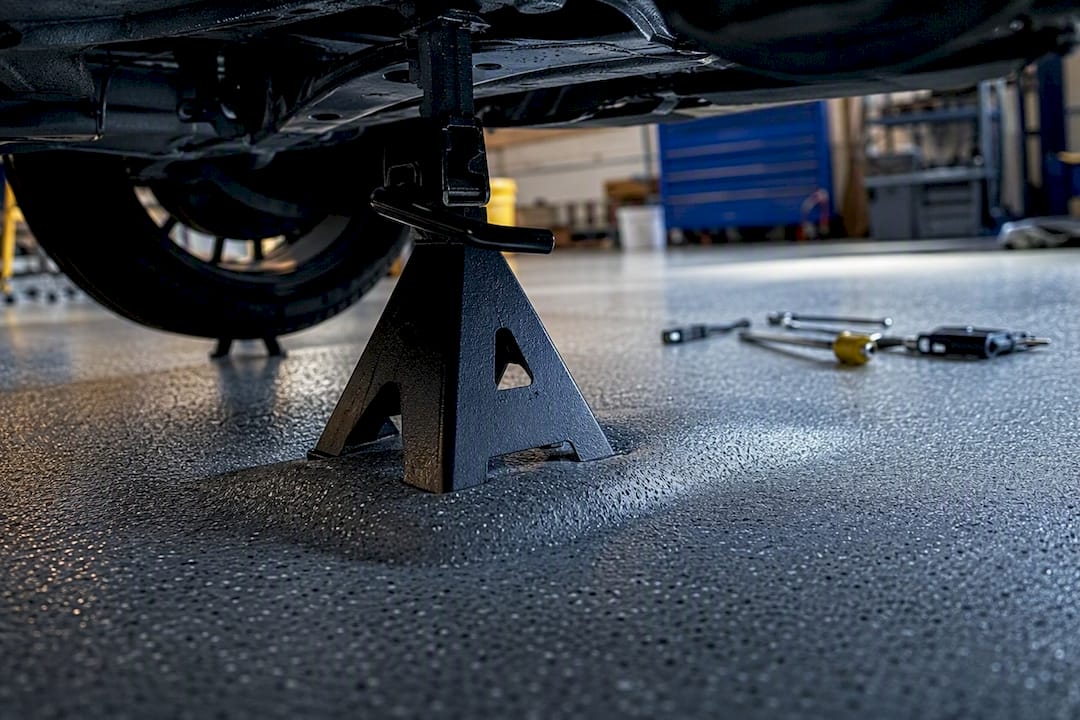
Polyaspartic trades some of that flex for better abrasion and hot-tire pickup resistance, plus superior color and gloss retention. If your priority is a showroom floor that still looks sharp after five years of foot traffic and the occasional hot tire mark from a summer drive, polyaspartic formulations generally hold up better cosmetically.
Neither material is any good without adhesion, and adhesion has almost nothing to do with the topcoat chemistry. It comes down to what's underneath. A polyaspartic or polyurea coating sprayed straight onto a dusty, laitance-covered slab will delaminate regardless of how expensive the resin is. That's why professional systems almost always include a primer or an epoxy body coat, something to key into the open pores of properly ground concrete, before either topcoat goes on.
One caution worth repeating: piling on an extra-thick single coat of polyaspartic to save a labor trip is a common shortcut that backfires. Overbuilt single coats trap solvents and risk delamination; thin, multiple coats cure cleaner and bond better.
Will My Floor Turn Yellow? UV Stability Compared
Not all polyurea is created equal here, and this is where a lot of homeowners get surprised a year or two after installation.
The distinction is aromatic versus aliphatic chemistry. Aromatic isocyanates are cheaper and react faster, but their molecular structure absorbs UV light in a way that produces a yellow tint over months of sun exposure. Aliphatic isocyanates cost more to produce but don't carry that UV-reactive structure, so they hold their original color far longer.
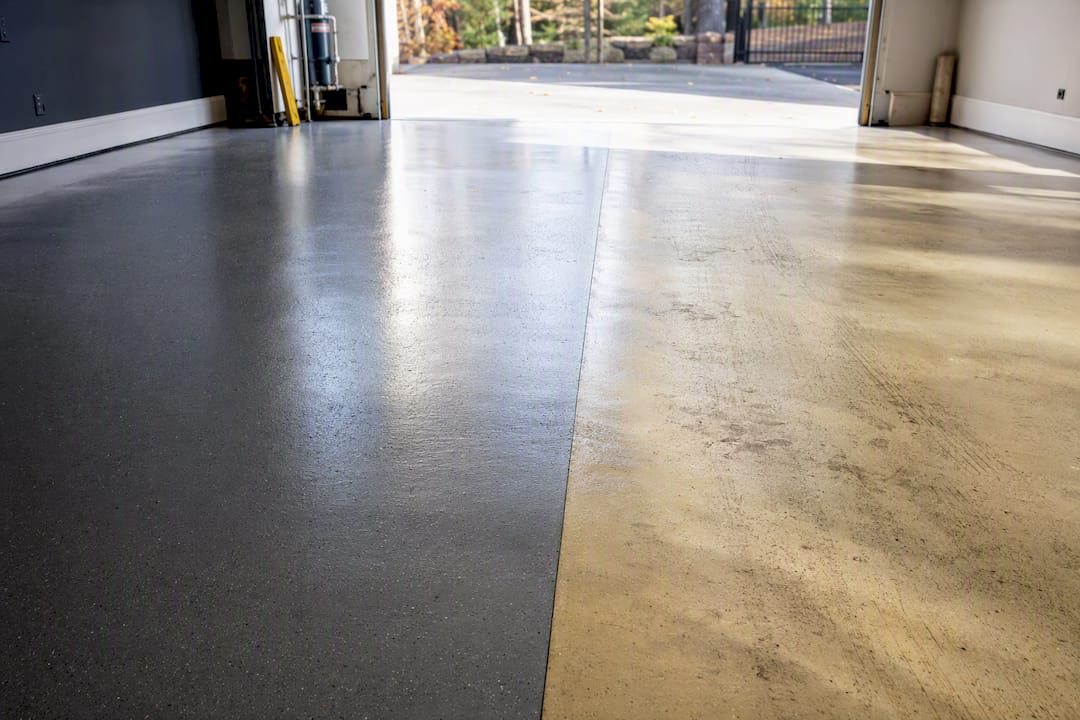
Polyaspartic is built almost exclusively on aliphatic chemistry, which is exactly why it's marketed as non-yellowing. Standard pure polyurea is often aromatic unless the installer specifically sources an aliphatic version, which costs more and is less commonly stocked for residential jobs.
For a garage with a north-facing door that barely sees sun, this matters less. For a sun-drenched patio or a garage with big west-facing windows, it's worth asking your installer directly which chemistry they're using, not just which brand name. If you're set on a darker color or a high-gloss finish in a sun-exposed space, aliphatic chemistry is the safer bet either way.
What Does a Polyaspartic or Polyurea Installation Actually Involve?
Most homeowners assume the coating is the expensive part. It isn't. Preparation is.
A legitimate installer starts with diamond grinding to open the concrete's pores and remove the laitance layer, cracks and low spots get patched, and the slab gets a moisture test if there's any history of dampness. Surface prep dominates the actual labor hours on a good job, often more time than mixing and applying the coating itself.
Equipment differs sharply by chemistry. Pure polyurea needs heated, plural-component spray equipment that meters and mixes both parts at high pressure right at the gun. Polyaspartic, by contrast, is frequently applied with standard rollers and squeegees, which is part of why it's the more common residential choice.
Before signing a contract, ask your prospective installer:
- Do you diamond grind every job, or only when the slab "looks bad"?
- Will you moisture test the concrete before applying anything?
- What resin system are you quoting, and is it a multi-coat build or a single thick pour?
- What's your warranty period, and does it cover delamination specifically?
- Can I see photos or an address of a similar job you completed at least two years ago?
Pro Tip: Ask to see a floor that installer finished two or three years ago, not last month. Fresh coatings all look great on day one; the real test is whether the color and gloss have held up after a few summers of UV and tire traffic.
What Do Polyurea and Polyaspartic Floors Cost Long-Term?
Sticker price on a quote tells you almost nothing about value. Lifespan does.
Installed pricing for both polyurea and polyaspartic systems generally runs in the $5 to $12 per square foot range, noticeably higher than basic epoxy. Polyaspartic often lands at the upper end of that range per square foot, but its faster cure means less downtime and often fewer callback repairs down the line.
Three things drive that price more than the resin itself: how much grinding and patching the slab needs, whether you add a decorative flake or quartz broadcast, and total square footage (small jobs carry a higher per-foot rate because setup costs don't shrink with the room).
Run the math over time instead of upfront cost alone. A $9,000 system that lasts 15 years costs $600 a year. A $5,500 system that needs a partial recoat in year six, plus another in year eleven, can easily cost more annually once you factor labor and downtime for each redo. Life-of-system value beats the number circled on the first quote almost every time.
Can You Combine Polyurea and Polyaspartic in One System?
Plenty of the best-performing residential floors aren't one material at all. They're a stack.
A common approach pairs a tough base layer, either an epoxy body coat or a polyurea membrane, with a polyaspartic topcoat on top. The base handles adhesion and, if it's polyurea, crack bridging and impact absorption. The polyaspartic layer on top delivers the UV-stable, color-true finish that actually shows.
Installers reach for a polyurea base under a polyaspartic top mainly on slabs with active hairline cracking or heavy impact risk, a home workshop with a welding table, for example. For a typical show garage or a patio without structural issues, an epoxy base with a polyaspartic topcoat usually does the job just as well at a lower cost.
Sequencing matters more than most people realize. Each layer needs to cure to the right hardness window before the next goes down, or you risk poor intercoat adhesion. This is exactly the kind of detail that separates a crew that's done a hundred of these floors from one quoting its first.
How to Choose the Right Coating for Your Floor
Match the system to how the space actually gets used, not to whichever material sounds more advanced in the sales pitch.
A daily-driver garage with two cars and normal foot traffic does fine with a standard epoxy base and polyaspartic topcoat. A heavy workshop with a lift, welding equipment, or dropped tools benefits from a polyurea base layer underneath for impact resistance. A sun-exposed patio or pool deck needs aliphatic, UV-stable chemistry on top, full stop, regardless of which base goes underneath.
Before you sign anything, ask contractors these questions:
- Will you diamond grind the entire surface, or spot-grind only visible problem areas?
- What's your moisture testing protocol for this specific slab?
- Which specific product line and resin type are you quoting, by name?
- How many coats, and what's the total mil thickness?
- What's covered under warranty, and for how long?
- Can I get that warranty and scope of work in writing before the deposit?
Walk away from any bid that skips grinding, skips moisture testing, or can't show you a real completed job. A contractor cutting prep corners to win on price today is the same contractor you'll be calling about delamination in eighteen months.
Pro Tip: Get at least two bids and compare warranty language line by line, not just the bottom-line price. A five-year warranty that excludes delamination is worth far less than a three-year warranty that covers it.
The Show Me Epoxy Approach to Polyurea and Polyaspartic Systems
At Showmeepoxy, every residential job starts the same way: diamond grinding the full slab, not spot treatment. That step opens the concrete's pores for a mechanical bond that outperforms a surface coating sprayed over unprepared laitance.
For most Mid-Missouri garages, Showmeepoxy recommends an industrial-grade epoxy body coat with a polyaspartic topcoat, the combination that best balances durability, UV-stable color, and fast turnaround. For workshops with heavy impact risk or existing crack activity, a more flexible base layer gets added into the system design before that topcoat goes down.
An Honest Take on the Polyurea vs Polyaspartic Debate
Homeowners spend a lot of energy debating chemistry labels when the more decisive factor is who's holding the spray gun. A mediocre installer can ruin premium polyaspartic resin on an unprepped slab, and a skilled crew can make a modest epoxy-polyaspartic combo outlast a poorly executed pure polyurea job.
My advice: stop shopping for the "better" material and start shopping for the better system design and the stronger warranty. If a quote seems unusually low, ask what got cut, because it's rarely the resin. It's almost always the grinding.
If you want a straight answer about which system fits your specific slab, get an on-site assessment before you commit to anything based on a phone quote.
— Stephen
Get a Free Estimate on Your Garage Floor Coating
Showmeepoxy handles the part most contractors skip: full diamond-grind prep on every job, not just the visible trouble spots. That single difference is what keeps a polyaspartic topcoat bonded for years instead of bubbling at the edges after one Missouri winter.

Showmeepoxy installs garage, basement, patio, and commercial epoxy and polyaspartic systems across Mid-Missouri, with custom color and flake options, slip-resistant finishes, and moisture mitigation built into the prep work. Every consultation is free and comes with a straight, no-pressure quote based on your actual slab, not a generic price sheet. If you want a ballpark number before scheduling a visit, try the free cost calculator. If you're ready to talk specifics, request your estimate and get a plan built for how your floor actually gets used.
Sources
- Polyurea vs Polyaspartic vs Polyurethane: A Formulator’s Raw-Material Guide – RawSource
- Polyaspartic floor coatings - Sherwin-Williams industrial resin flooring resources
- Polyurea & Polyaspartic Garage Floor Coating Cost 2026: Full Price Breakdown | The Garage Guide
- Polyurea vs Polyaspartic: Which Concrete Floor Coating Is Best - Applegate Property Improvements