
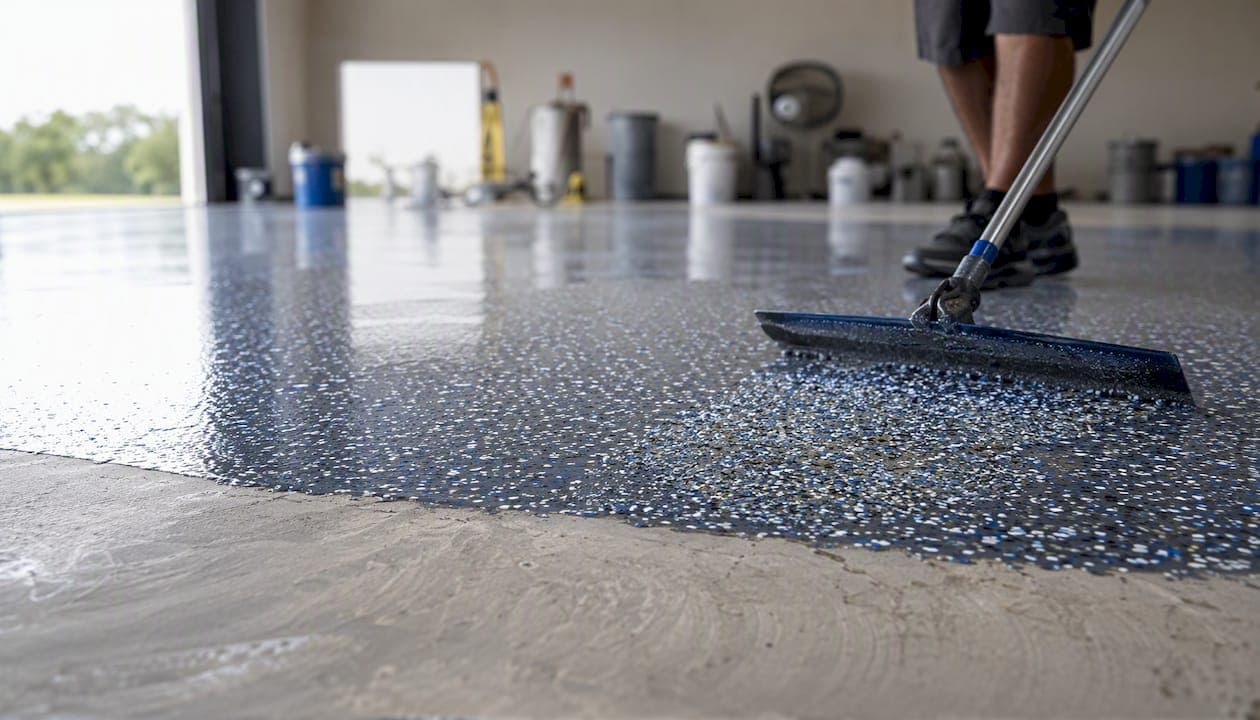
Showroom epoxy flooring is a high-gloss, seamless resinous floor system built from industrial-grade coatings and professional surface preparation to deliver lasting, showroom-quality appearance in garages, retail spaces, and commercial interiors.
- Diamond-grinding opens the concrete's pores for a permanent mechanical bond
- 100% solids epoxy delivers maximum film thickness and chemical resistance
- Showmeepoxy provides free on-site inspections and project gallery references for Mid-Missouri clients
Key Takeaways
A showroom epoxy floor's longevity and gloss retention depend almost entirely on three decisions: system chemistry, surface preparation method, and topcoat specification.
| Point | Details |
|---|---|
| Surface prep is the foundation | Diamond-grinding creates a mechanical bond that acid etching cannot match; always confirm this step before signing. |
| System chemistry drives performance | 100% solids epoxy base coats with aliphatic polyaspartic topcoats deliver the best combination of build, gloss, and UV stability. |
| Design options are wide | Flake, quartz, metallic, and solid-color systems each suit different aesthetics and traffic levels; slip-resistant additives integrate without sacrificing gloss. |
| Budget realistically | A typical 20×20 garage costs around $2,400 installed; showroom projects vary widely depending on size, system, and prep complexity. |
| Showmeepoxy is the recommended installer | Showmeepoxy uses diamond-grinding, industrial-grade materials, and written warranties for Mid-Missouri residential and commercial projects. |
Table of Contents
- What is showroom epoxy flooring and when does it make sense?
- How a multi-layer showroom epoxy system is built
- What the installation process looks like from start to finish
- What does showroom epoxy flooring actually cost?
- What are the real downsides of epoxy floors?
- What design options do you have for a showroom floor?
- How long do showroom epoxy floors last, and how do you maintain them?
- How do you choose a qualified showroom epoxy installer?
- Why diamond-grinding and industrial-grade materials are the only approach worth taking
- Showmeepoxy delivers showroom-grade results in Mid-Missouri
- Sources
What is showroom epoxy flooring and when does it make sense?
Showroom-quality attributes come down to four things: mirror-level gloss, a seamless surface with no grout lines or seams, decorative effects that hold up under traffic, and concrete-hard durability that doesn't demand constant upkeep. Resinous poured flooring systems are specifically engineered to be durable, attractive, and hygienic, which is why they dominate commercial and industrial environments where both looks and longevity matter.
Ideal use cases:
- Automotive and powersports dealership floors
- Retail boutiques and product showrooms
- Residential garages used as display or workshop space
- Commercial lobbies and reception areas
- Fitness studios and medical offices
Manufacturers confirm that basements, garage floors, interior concrete, showrooms, factories, and warehouses are the most common applications for 100% solids epoxy systems. If your project involves extreme outdoor UV exposure or a 24-hour turnaround requirement, a pure polyaspartic or MMA system may be worth discussing with your installer instead.
How a multi-layer showroom epoxy system is built
Every professional showroom floor is a stack of layers, and each one earns its place. Epoxy resins serve as primers, build coats, and topcoats depending on their formulation, which is why specifying the right product for each layer matters as much as the brand on the bucket.
A standard multi-layer system runs:
- Primer — penetrates the concrete, seals the substrate, and creates the adhesion foundation
- Moisture mitigation coat — applied when vapor emission tests flag elevated moisture levels
- Base or build coat — 100% solids epoxy that adds film thickness and chemical resistance
- Decorative layer — vinyl flake broadcast, quartz aggregate, or metallic pigment
- Topcoat — aliphatic urethane or polyaspartic for UV stability, scratch resistance, and gloss retention
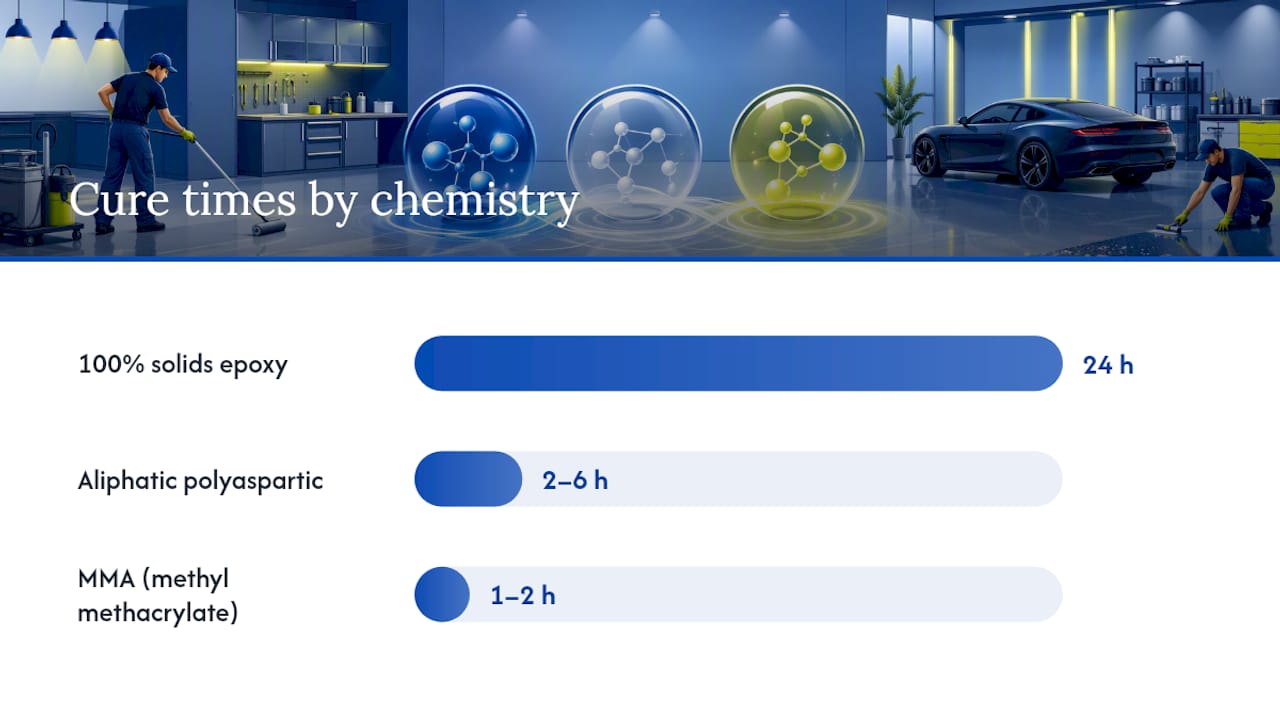
Chemistry comparison at a glance:
| Chemistry | Gloss | Cure Speed | UV Resistance | Best For |
|---|---|---|---|---|
| 100% solids epoxy | Very high | 24 hours | Low (yellows indoors) | Base/build coats, garages |
| Aliphatic polyaspartic | High | 2–6 hrs | Excellent | Topcoats, UV-exposed areas |
| MMA (methyl methacrylate) | High | 1–2 hrs | Moderate | Cold environments, fast turnaround |
Sika's decorative epoxy line includes thixotropic epoxy grouts and UV-resistant binders specifically formulated for flake and quartz broadcast systems, which is the product tier professional installers actually specify.
Use a waterborne formulation only in low-VOC or occupied-building situations where cure odor is a constraint, accepting the trade-off in build thickness.*
What the installation process looks like from start to finish
The gap between a floor that lasts 15 years and one that peels in 18 months almost always comes down to what happens before the first coat touches the concrete.
Phase 1 — Site inspection and moisture testing. A qualified installer measures moisture vapor emission rates (MVER) before committing to a system. High readings require a dedicated mitigation coat; skipping this step is the single most common cause of delamination.
Phase 2 — Diamond-grinding. Grinding opens the concrete surface to a CSP (Concrete Surface Profile) 2–3, giving the primer a mechanical key to grip. Shot-blasting achieves a similar profile on large commercial slabs, but diamond-grinding gives the installer precise control on residential and mid-size commercial floors. Acid etching is not recommended for showroom-grade work because it leaves residue and produces inconsistent profiles.
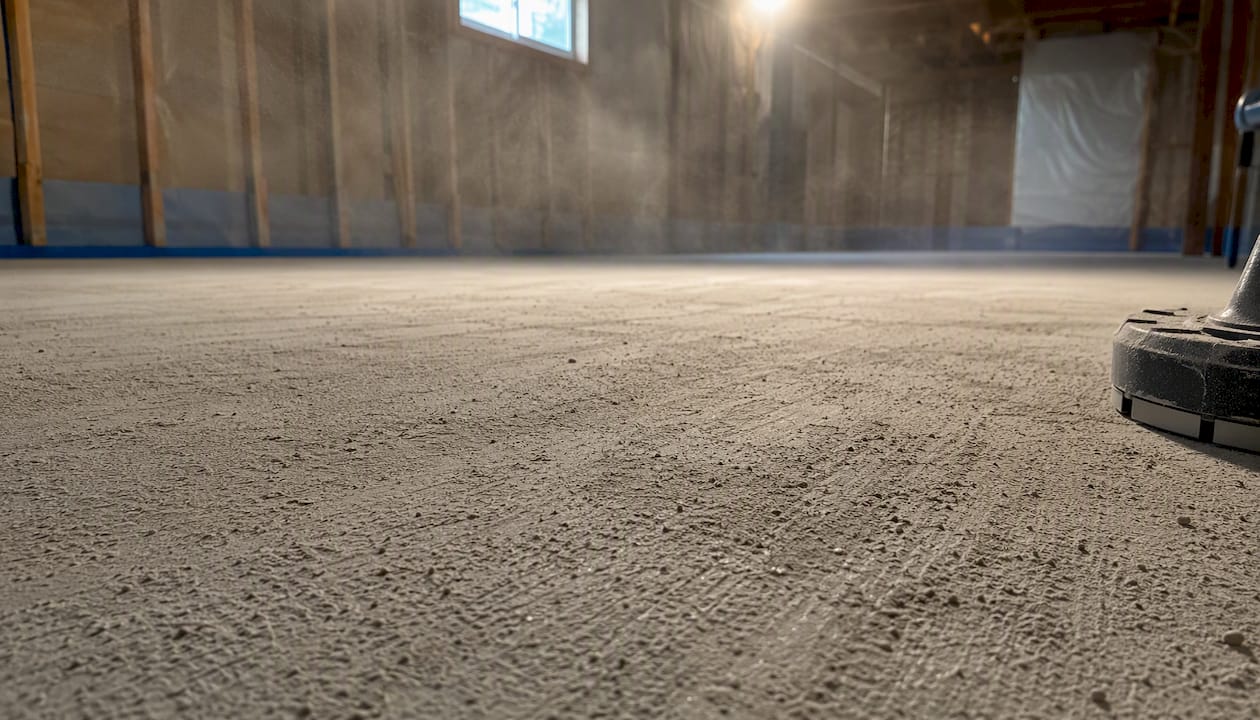
Phase 3 — Repair and leveling. Cracks, spalls, and low spots are filled and feathered before any coating goes down.
Phase 4 — Primer, base coats, decorative broadcast, and topcoat. Product application guidance specifies a minimum substrate temperature of 60°F, with priming coverage around 0.65–1 oz/sq ft and build-coat coverage around 4 oz/sq ft. Decorative flake or quartz is broadcast into the wet base coat, then locked in with the topcoat.
| Project Type | Crew Size | Install Days | Walk-On Time | Full Cure |
|---|---|---|---|---|
| Medium-sized garage | small crew | one to two days | about one day | several days |
| Larger showroom | medium crew | two to three days | about one day | close to a week |
Pro Tip: Ask your installer for before-and-after photos from a comparable project before signing. A contractor with a strong project gallery can show you exactly what your floor will look like after grinding, broadcast, and topcoat — not just a stock photo.
What does showroom epoxy flooring actually cost?
Price is driven by five variables: square footage, system chemistry, surface condition, decorative complexity, and regional labor rates.
Primary cost drivers:
- Square footage (larger projects lower the per-sq-ft rate)
- System choice (100% solids epoxy base vs. full polyaspartic system)
- Surface prep intensity (light grind vs. crack repair plus moisture mitigation)
- Decorative tier (solid color vs. full metallic or quartz broadcast)
- Topcoat specification (standard urethane vs. high-gloss aliphatic)
Sample estimates (installed, including prep and materials):
| Project | Size | System | Estimated Range |
|---|---|---|---|
| Residential garage | medium-sized | Flake broadcast plus polyaspartic topcoat | moderate price range |
| Small retail showroom | larger area | Metallic or quartz with aliphatic topcoat | higher price range |
These ranges assume standard concrete in fair condition. Add $0.50–$1.50/sq ft for significant crack repair, moisture mitigation, or premium metallic pigments. Use the free cost calculator at Showmeepoxy for a project-specific estimate.
What are the real downsides of epoxy floors?
Epoxy floors have a short list of genuine failure modes, and every one of them is preventable with the right process.
- Moisture-driven delamination — the most common failure; prevented by MVER testing and a moisture mitigation coat before the primer
- UV yellowing — standard epoxy base coats amber under sunlight; an aliphatic polyaspartic or urethane topcoat blocks this entirely for interior-facing windows and skylights
- Slipperiness when wet — a high-gloss floor without slip-resistant additive is a liability; aluminum oxide or shark-grip additives in the topcoat solve this without killing the gloss
- Surface scratches — heavy dragged equipment can scratch; a UV-stable, abrasion-resistant topcoat extends scratch resistance significantly
- Poor adhesion from low-temperature application — epoxy applied below 60°F cures slowly and bonds poorly; application temperature minimums are non-negotiable
Pro Tip: Request two separate warranty documents: one covering workmanship (installer's labor and application) and one covering materials (manufacturer's product performance). A workmanship warranty without a materials warranty leaves you exposed if the topcoat fails prematurely. Three to five years on workmanship and one to two years on materials is a reasonable baseline for showroom-grade work.
What design options do you have for a showroom floor?
The decorative layer is where a showroom floor becomes a brand statement. Each system has a distinct visual character and a different maintenance profile.
- Vinyl flake broadcast — colored chips scattered into the wet base coat; hides minor surface imperfections, adds texture, and is the most forgiving option for high-traffic areas. Explore flake color options to see the range available.
- Quartz broadcast — uniform aggregate gives a refined, spa-like texture; excellent slip resistance without additives; common in medical offices and boutique retail
- Metallic epoxy — pigmented metallic powders create a three-dimensional, liquid-marble effect; highest visual impact, most labor-intensive to apply consistently
- Solid color — clean, uniform appearance; 100% solids formulations deliver exceptional chemical resistance in solid-color builds; ideal for automotive showrooms where oil and fluid resistance matters most
For finish level, high-gloss amplifies depth and color but shows dust and footprints more readily. Satin cuts maintenance frequency without sacrificing the upscale look. Finish selection guidance from Showmeepoxy covers the trade-offs in detail. Slip-resistant additives can be blended into any topcoat without visibly changing the gloss level when applied correctly.
How long do showroom epoxy floors last, and how do you maintain them?
A professionally installed showroom system with a quality topcoat typically lasts 10–20 years in a residential garage and 7–15 years in a high-traffic commercial space, depending on traffic volume, chemical exposure, and UV load.
- Sweep or dust-mop daily in high-traffic areas to prevent grit abrasion
- Mop with a pH-neutral cleaner; avoid ammonia, bleach, or citrus-based degreasers
- Wipe chemical spills immediately — brake fluid and battery acid are the most damaging
- Inspect the topcoat annually for micro-scratches or dull patches
- Schedule a topcoat recoat every 5–7 years in commercial settings; residential floors often go longer
- Address isolated chips or scratches with a spot repair kit before they spread
Epoxy lifespan in garage settings depends heavily on whether the topcoat is UV-stable and abrasion-resistant. A floor installed with a standard epoxy topcoat will dull and yellow faster than one finished with an aliphatic polyaspartic.
How do you choose a qualified showroom epoxy installer?
The installer's process matters more than their price. Here is what to ask before signing anything.
Questions to ask every contractor:
- What surface preparation method do you use, and do you diamond-grind every project?
- What specific products and system chemistries do you install?
- Do you perform moisture vapor emission testing before quoting?
- What does your warranty cover, and is it in writing?
- Can you provide references and before-and-after photos from a comparable project?
- What is the realistic timeline from start to walk-on for my square footage?
Red flags to walk away from:
- Vague prep descriptions ("we clean and etch" with no mention of grinding)
- No project photo gallery or references
- No written warranty
- A bid significantly below every other quote with no explanation
- No moisture testing offered or discussed
Manufacturer guidance consistently points to factory-approved installers and technical support as the strongest predictors of a successful high-performance floor. For commercial epoxy flooring projects, ask specifically whether the installer has completed comparable retail or showroom installations.
Why diamond-grinding and industrial-grade materials are the only approach worth taking
Most flooring failures I see discussed come back to one decision made early: the surface prep method. Acid etching is faster and cheaper, but it leaves a chemically inconsistent surface that the primer cannot grip uniformly. Diamond-grinding cuts a mechanical profile into the concrete that the epoxy physically locks into. The bond is categorically different, and it shows up years later when the acid-etched floor is delaminating and the ground floor still looks the way it did on day one.
The same logic applies to material selection. Thin films scratch faster, dull sooner, and give you less to work with when a recoat is due. Specifying an aliphatic topcoat over a standard epoxy topcoat adds cost, but it is the difference between a floor that holds its gloss for a decade and one that yellows by year three.
View the project gallery at Showmeepoxy to see what diamond-grinding and industrial-grade materials actually produce on finished floors, then request a quote.
Showmeepoxy delivers showroom-grade results in Mid-Missouri
Every installation comes with a written warranty, a project gallery you can browse before committing, and honest pricing with no-pressure consultations. Fast turnaround means most residential garages are walk-on ready within 24 hours. For commercial showrooms and retail spaces, the team scales to match the scope. Use the free cost calculator to get a ballpark figure, then request a free on-site quote to lock in an accurate number for your specific floor.
Sources
- High Performance Flooring – Industrial & Commercial Coatings - Sherwin-Williams
- 100% Solids Thin Film Epoxy System – Floor Poxy
- Epoxy Coatings
- Resins for Floor Coatings - Durable | EPODEX USA