
Epoxy is one of the strongest choices you can make for a workshop floor, and in most shops it will outperform bare concrete, vinyl, or paint by a wide margin. The catch is that the coating itself is rarely what fails; poor surface prep is. Expect to spend somewhere between $3 and $5 per square foot on a DIY kit, plan for a multi-day project once you count cure time, and treat diamond grinding as non-negotiable if you want the floor to survive years of rolling tool chests and dropped wrenches.
TL;DR:
- Diamond grinding is an essential step that ensures epoxy bonds properly and prevents early failure, especially in heavy-use workshop environments.
- A 100% solids epoxy provides the best chemical resistance and abrasion durability, making it suitable for demanding workshop activities involving oil, solvents, and dropped tools.
- Moisture testing should be performed before coating, with vapor emission rates exceeding 3 pounds per 1,000 square feet per day indicating adhesion risks regardless of system quality.
- Costs for DIY epoxy kits range from $3 to $5 per square foot, while professional installation often costs $6 to $12 per square foot, with timeframes typically spanning a weekend or one to two days.
- Proper maintenance, including regular cleaning and prompt spill cleanup, can extend the epoxy floor’s lifespan to 10-20 years, with recoat intervals of 5 to 10 years depending on use.
Table of Contents
- What Type of Epoxy Flooring Works Best for a Workshop?
- How Do You Prep Concrete Before Coating a Workshop Floor?
- What Are the Steps to Install an Epoxy Floor Yourself?
- What Should You Check Before Buying an Epoxy Kit?
- How Much Does a Workshop Epoxy Floor Cost and How Long Does It Take?
- How Do You Maintain and Repair an Epoxy Workshop Floor?
- What Are the Downsides of Epoxy Floors and How Do You Avoid Them?
- Why Diamond Grinding Is the Backbone of a Durable Shop Floor
- Stephen's Take on What Actually Matters Here
- Ready for a Professional Epoxy Install? Here's What Show Me Epoxy Offers
- Sources
What Type of Epoxy Flooring Works Best for a Workshop?
Not all resinous coatings are built the same, and picking the wrong one for your shop's daily abuse is the fastest way to end up recoating in three years instead of fifteen.
100% solids epoxy is the workhorse for workshop floors. It has no water or solvent carrying the resin, so nearly all of what you apply stays on the floor as a thick, hard film. It resists gasoline, brake fluid, motor oil, and most solvents you'd find in an automotive or metalworking shop, and lab and field comparisons consistently show it holding up to abrasion better than vinyl or unsealed concrete.
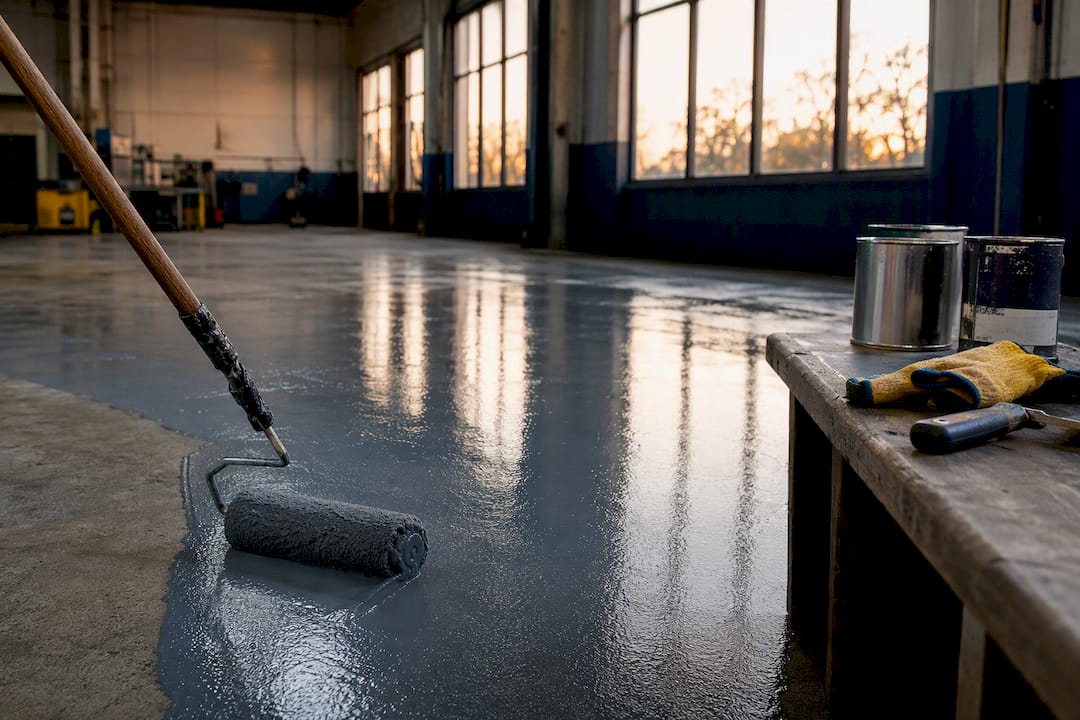
Water-based and solvent-modified epoxies trade some hardness and chemical resistance for easier application and lower odor. They work fine for a hobby woodshop or a garage used mostly for storage, but they're a weaker pick if you're grinding metal or running a lift.
Polyaspartic and polyurea coatings cure in hours instead of days and hold up better under UV light and temperature swings, which matters if your shop door stays open or the floor gets direct sun. Contractors commonly use them as a fast topcoat over an epoxy base coat, combining the epoxy's adhesion and buildup with the polyaspartic's quick return to service.
Finish choice matters as much as chemistry:
- Solid color is the cheapest and easiest to keep clean, but it shows wear patterns faster in high-traffic zones.
- Flake systems hide dirt and minor imperfections and add texture underfoot.
- Quartz or silica broadcast boosts traction and abrasion resistance, which is why it shows up so often in shop floors that see oil, coolant, or sawdust.
- Metallic epoxy looks great in a showroom garage but isn't the first choice for a working shop that will see grinding dust and dropped tools.
That single spec change does more for slip resistance than almost anything else you can choose.
How Do You Prep Concrete Before Coating a Workshop Floor?
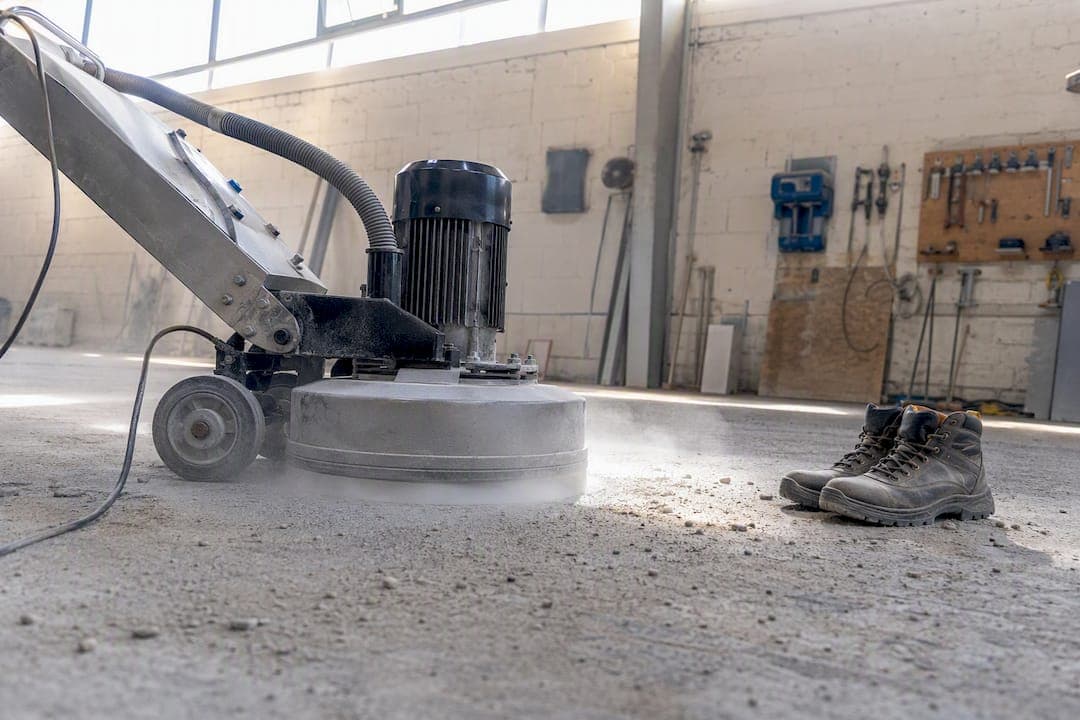
Surface prep is where workshop floor epoxy jobs succeed or fail, and it's not close. Diamond grinding mechanically opens the pores of the concrete, stripping away laitance, old sealers, and contaminants to create a rough profile the coating can grip. Acid etching does something similar chemically, but it's shallower and less consistent, and it's a documented leading cause of premature peeling in floors that see heavy daily use.
Contractors target a specific roughness range called a Concrete Surface Profile, or CSP. For a workshop floor carrying rolling tool chests, jack stands, and dropped equipment, a CSP of 2 to 3 is the standard target. That profile also matters below the surface: grinding reduces micro-voids in the slab that would otherwise trap moisture and set up a cold-joint failure months down the line.
Before any coating goes down, test the slab for moisture. Two standard methods:
- Calcium chloride test (ASTM F-1869) measures moisture vapor emission rate over a set period.
- In-situ probe test (ASTM F-2170) measures relative humidity inside the slab itself.
Moisture vapor emission above roughly 3 pounds per 1,000 square feet over 24 hours puts you at risk for adhesion loss, no matter how good the coating is.
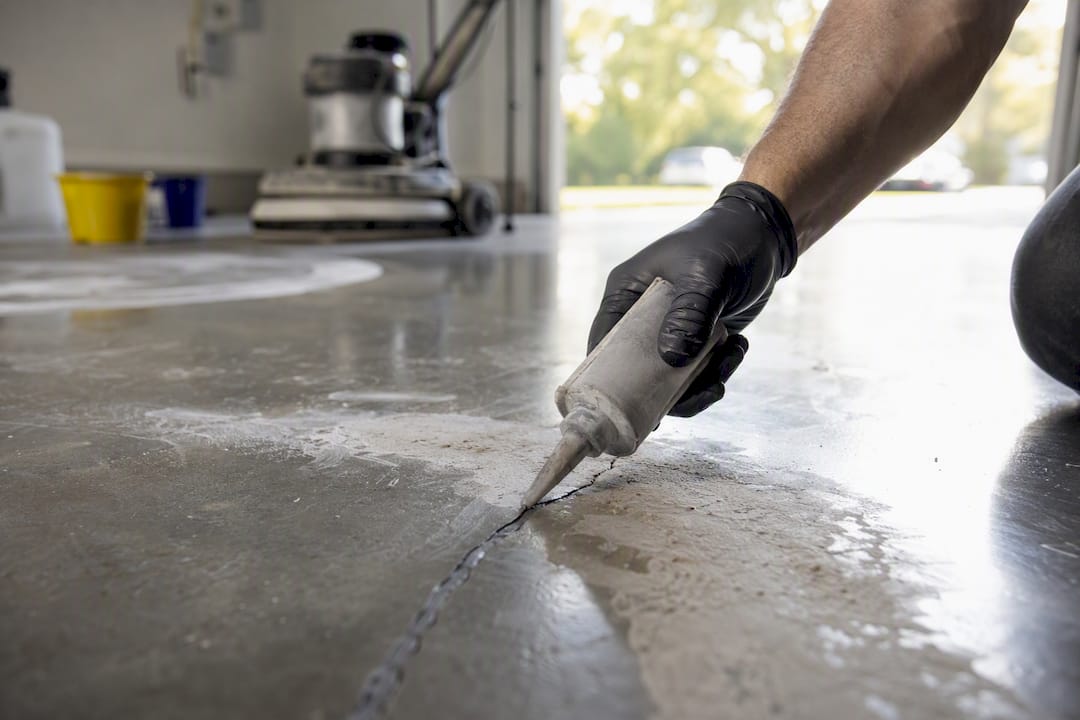
Once the slab is ground and tested, walk it for cracks, spalls, and low spots. Hairline cracks get filled with a flexible epoxy crack filler. Spalled or pitted areas need a patching compound, ground flush once cured. Low spots get self-leveling underlayment, because epoxy will not correct an uneven pour, it will just highlight it once the light hits the sheen.
Pro Tip: If you see efflorescence (a white, chalky residue) on the slab or the floor has flooded in the past, get a moisture test before you buy a single gallon of epoxy. A vapor barrier or moisture-mitigating primer is a lot cheaper than tearing out a failed floor.
Call a professional if the moisture readings fail, if you find structural cracking that suggests slab movement, or if the shop will carry heavy equipment loads like a two-post lift. Those situations call for judgment calls a DIY guide can't fully cover.
What Are the Steps to Install an Epoxy Floor Yourself?
Once the slab is ground, tested, and repaired, the actual coating work follows a fairly rigid sequence. Skipping steps or rushing cure windows is the second most common reason DIY jobs fail.
Day one: final prep.
- Grind the entire floor with a diamond grinder, working in overlapping passes.
- Vacuum thoroughly, ideally with a dust-collecting grinder attachment, then go over it again with a shop vac.
- Confirm slab temperature and ambient temperature are both within the manufacturer's range, generally above 55°F, since epoxy resists curing properly in cold conditions.
- Re-run a spot moisture check if the floor sat exposed to rain or humidity between grinding and coating.
Day two: primer and base coat.
Roll it out at the specified coverage rate, then back-roll immediately to work it into the profile and avoid bubbles. Let it cure to the recoat window listed on the technical data sheet before moving to the base coat.
The base coat goes down the same way: mix, pour in ribbons across the section you're working, then cut in with a squeegee before back-rolling. Work in sections you can finish before the pot life runs out. This is where a second person earns their keep. One mixes and pours, the other back-rolls.
Broadcasting and grout coat.
If you're adding flake or quartz, broadcast it into the wet base coat by hand or with a hopper gun while the coating is still tacky. Heavier broadcast rates improve texture and traction but also mean a thicker grout coat and more grinding before the topcoat goes on, since over-broadcasting requires filling and leveling that fine aggregate layer before anything else can be applied. Once the base coat cures, scrape off loose flake, vacuum again, and lightly grind or screen the surface to knock down any sharp points.
Topcoat.
Most workshop floors get a clear polyaspartic or epoxy topcoat over the base for chemical resistance and sheen. Polyaspartic topcoats cure faster, often allowing foot traffic within 24 hours and light equipment within a few days, which is a real advantage if the shop can't sit idle for a week.
Watch cure timelines closely. Recoat too late and you risk poor intercoat adhesion because the previous layer has fully cross-linked. Recoat too early, or apply in high humidity, and you can get blush, a hazy or amine-blush film on the surface that weakens adhesion and looks cloudy. If you see blush, a light abrasion pass before the next coat usually solves it. If a coat feels tacky or soft days after it should have cured, that's an off-cure, usually from an incorrect mix ratio or temperature that dropped too low overnight.
Give the final coat its full cure time before rolling in equipment. Light foot traffic is often fine within 24 hours, but full cure for chemical and heavy load resistance can take a week or more depending on the system.
What Should You Check Before Buying an Epoxy Kit?
Not every "epoxy kit" sold at a big box store is built for shop-floor abuse. Before you buy, run through this checklist:
- Match the system to your dominant activity. A woodshop with light foot traffic has very different needs than an automotive bay with a rolling jack and hot tire contact.
- Check the solids percentage. A true 100% solids epoxy will say so explicitly. Anything vague like "high solids" without a number is worth questioning.
- Confirm recommended mil thickness. Workshop floors generally need a thicker build, often in the 10 to 20 mil range for the base coat alone, more with a broadcast system.
- Check VOC content, especially if you're coating an attached garage or a shop without strong ventilation.
- Review the cure temperature range. If your shop runs cold in winter, a standard epoxy may not be the right call. Polyaspartic tolerates a wider range.
- Look for required substrate profile. A legitimate technical data sheet will specify a CSP target, which tells you whether grinding is expected.
Pro Tip: If a kit's instructions don't mention grinding, moisture testing, or a specific CSP target at all, treat that as a sign the manufacturer is selling to homeowners doing light cosmetic work, not to anyone parking a truck on it.
How Much Does a Workshop Epoxy Floor Cost and How Long Does It Take?
Budget and timeline questions come up more than almost anything else, and the honest answer is that both depend heavily on your slab's starting condition.
DIY kits typically run $3 to $5 per square foot in materials, covering the grinder rental (or purchase), primer, base coat, and topcoat. Professional installation commonly runs $6 to $12 per square foot once labor, equipment, and diamond grinding are factored in, with the range shifting based on prep needs and system complexity.
Worked example: a 20x20 workshop (400 square feet).
- DIY materials at $3 to $5 per square foot: roughly $1,200 to $2,000, plus grinder rental if you don't own one.
- A weekend timeline is realistic for the coating work itself, spread across prep, primer, base, and topcoat days.
- Professional install at $6 to $12 per square foot: roughly $2,400 to $4,800, typically completed in one to two days including grinding.
The math that matters most: a 400 square foot shop floor that fails from poor prep doesn't just cost the original $1,200 to $2,000 in materials. It costs that again in removal and a redo, plus the downtime.
Costs climb when moisture mitigation primer is required, when cracks or spalling need significant patching, when you're running a heavy broadcast system that needs a grout coat and extra grinding, or when you choose a fast-cure polyaspartic system to minimize shop downtime. Look for warranty language that specifically names adhesion and delamination coverage, not just "workmanship," and check whether it requires the grinding step to remain valid.
How Do You Maintain and Repair an Epoxy Workshop Floor?
A properly installed epoxy floor can run 10 to 20 years before needing a full recoat, but that lifespan depends on how you treat it day to day.
- Sweep or dust-mop regularly to keep grit from grinding into the finish under rolling equipment.
- Clean with a neutral pH cleaner and water. Avoid strong solvents on any exposed or unfinished edges, since they can soften the coating over time.
- Wipe up oil, brake fluid, or coolant spills promptly. Epoxy resists staining far better than bare concrete, but it isn't immune to every chemical indefinitely.
- Put pads or plywood squares under jack stands and heavy rolling tool chests to spread the load and reduce point wear.
- Minimize how long a hot tire sits parked directly on the coating, particularly in summer.
For a heavy-use shop, plan on a fresh topcoat every 5 to 10 years to renew gloss and chemical resistance without redoing the whole system. Small gouges or chips are fixable: grind the damaged spot back to sound material, clean it thoroughly, and recoat with a matching product. Larger delamination, especially anything that lifted in sheets rather than chipped, usually points to a prep failure underneath and is worth a professional look before you just patch over it and hope.
What Are the Downsides of Epoxy Floors and How Do You Avoid Them?
Epoxy isn't flawless, and knowing the failure points ahead of time saves you a service call later.
- Slip risk when wet. A smooth, glossy epoxy can be slick with water, oil, or coolant on it. Adding silica or quartz grit into the finish raises the coefficient of friction and is worth specifying up front for any shop handling fluids.
- Adhesion failure. Almost always traced back to moisture vapor emission or an insufficient concrete profile, reinforcing why grinding and moisture testing come before anything else.
- Hot-tire pickup. Tires that sit hot right after driving can bond slightly to standard epoxy, then peel a thin layer when the car moves. Polyaspartic topcoats resist this better.
- Cold and cure issues. Most epoxies won't cure properly below roughly 55°F, which matters for unheated shops in winter.
- UV yellowing. Standard epoxy can yellow with direct sun exposure over years. Polyaspartic holds color better in bright shops or open-door garages.
For spaces with constant water exposure or extreme cold with no heat source, a polyaspartic or polyurea system, or a different flooring category entirely, may fit better than standard epoxy.
Why Diamond Grinding Is the Backbone of a Durable Shop Floor
Diamond grinding isn't a nice-to-have step tacked onto the estimate to run up the bill. It's mechanical surface prep that determines whether the epoxy actually bonds to the concrete or just sits on top of it waiting to peel. Grinding strips away laitance, old sealers, and surface contamination while cutting a repeatable profile the coating can key into.
"Diamond grinding is the most important step in any epoxy install," and skipping it in favor of a quicker acid etch is one of the most common reasons shop floors fail years earlier than they should.
That statement comes straight from how Show Me Epoxy approaches every installation, and it's why the company treats grinding as a standard part of the process rather than an upsell. Combined with quick turnaround times and a strong track record of satisfied clients, that grinding-first approach is the difference between a floor that looks good at the walkthrough and one that still looks good in year twelve. If you want the deeper technical breakdown of CSP targets and why acid etching falls short, Show Me Epoxy's guide on grinding concrete before epoxy covers it in more detail. For a workshop floor specifically, insist on grinding. It's the one step you should never let a contractor skip to save a few hours.
Stephen's Take on What Actually Matters Here
If I had to boil this whole topic down to three things, it's prep, prep, and matching the system to how you actually use the space. Grinding gets skipped more than anything else on this list because it's the least visible line item on a quote, and it's the one that determines whether you're recoating in three years or fifteen. If your shop handles oil, coolant, or sawdust regularly, don't skip the grit in the broadcast. A slightly less glossy floor that you can actually stand on safely beats a showroom finish that turns into an ice rink the moment something spills.
As for DIY versus hiring out: if your moisture tests come back clean and your slab is in decent shape, a weekend DIY job is genuinely doable. If you're dealing with cracks, past flooding, or a floor that needs to handle a two-post lift, call a professional. Start by getting your slab moisture tested this week, before you buy a single gallon of anything.
— Stephen
Ready for a Professional Epoxy Install? Here's What Show Me Epoxy Offers
A DIY weekend can get you a solid floor, but it demands a grinder, a second set of hands, and a tolerance for getting the mix ratios exactly right under time pressure. Showmeepoxy skips that trade-off entirely: every installation starts with full diamond grinding to a proper concrete profile, uses industrial-grade epoxy and polyaspartic materials, and gets your shop back in service fast, without you renting equipment or gambling on pot life.

If you're weighing the hours a DIY job will actually take against a done-right professional result, run your numbers through the free epoxy flooring cost calculator to see where your project lands. Showmeepoxy also handles basement, patio, and outdoor coatings alongside workshop and garage floors, all backed by honest pricing and no-pressure consultations. When you're ready to compare a quote against the DIY route, get in touch for a free estimate and find out what a properly ground, properly coated floor actually costs for your space.
Sources
- Epoxy flooring: DIY or hire a professional? - Refab Pro
- Choosing the Right Materials for Durable Workshop Flooring (Material Guide)