
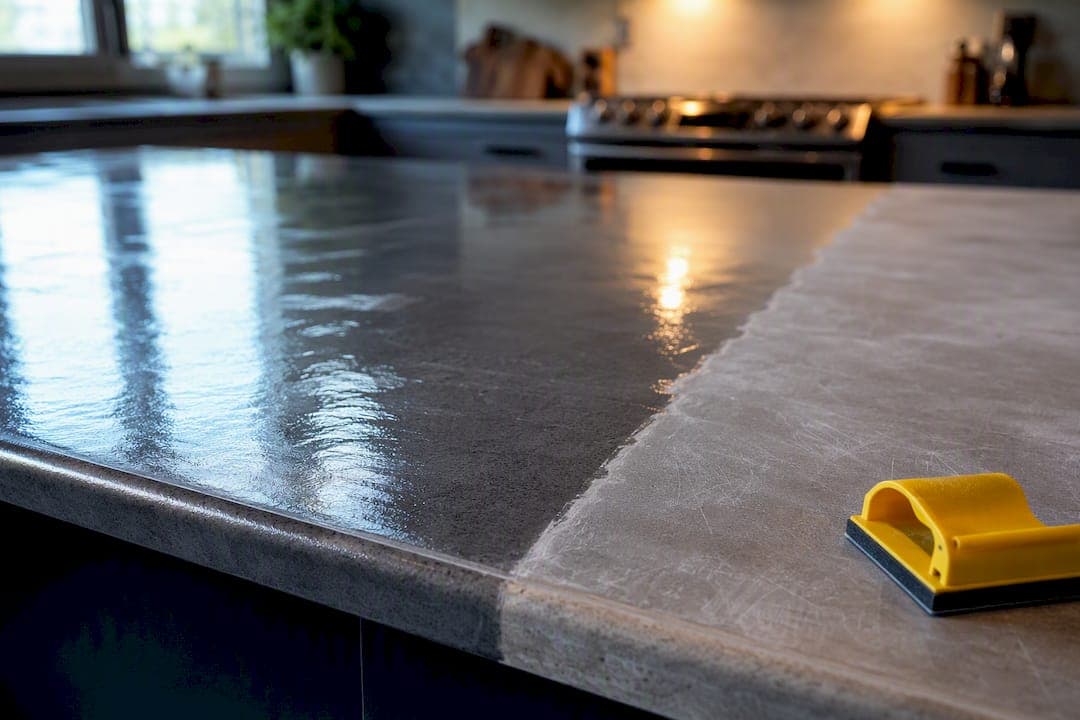
Yes, epoxy bonds to laminate, as long as the surface is structurally sound, degreased, and mechanically abraded before you pour. Skip that prep and you'll see peeling within weeks. Do it right and you get a glossy, durable, customizable countertop for a fraction of a stone replacement, with several days of downtime and some fussy work around seams and sinks.
TL;DR:
- Proper surface preparation, including degreasing and mechanical abrasion, is essential to ensure epoxy adhesion and prevent peeling within weeks.
- Using a countertop-specific epoxy kit with a bonding primer is crucial for a durable, glossy finish on laminate surfaces, whereas floor epoxies are unsuitable.
- Full curing takes from 72 hours for normal use to up to 30 days for maximum hardness, so delaying sink reinstallation and heavy use is necessary.
- Common epoxy failures result from contamination, improper mixing, or insufficient surface prep, but small test pours can help identify issues early.
- A professional approach involves more aggressive surface prep and addresses substrate issues like moisture damage or delamination before epoxy application.
Table of Contents
- What Materials and Tools Do You Need to Epoxy Over Laminate?
- How Do You Prepare Laminate for Epoxy?
- How Do You Mix and Pour Epoxy Over a Countertop?
- How Long Does Epoxy Take to Cure on a Countertop?
- Why Do Epoxy Countertops Fail, and How Do You Fix It?
- What Would a Contractor Do Differently on This Job?
- DIY or Hire a Pro? A Quick Decision Guide
- Ready for a Professional Countertop Finish?
- Sources
- FAQ
What Materials and Tools Do You Need to Epoxy Over Laminate?
Grab a countertop-specific epoxy kit, not a garage floor product. Countertop kits pair a clear flood coat with a compatible color or topcoat layer, formulated to self-level thin and cure crystal clear, which is exactly what a floor epoxy is not built to do. Bonding to laminate depends heavily on a primer or sealer step, since manufacturer guidance commonly calls for a bonding undercoat on nonporous substrates like laminate before the color or flood coat goes on. If your kit doesn't include one, ask the manufacturer for a compatible bonding primer rather than skipping it.
Beyond the epoxy itself, here's what belongs on your shopping list:
- Sanding pads or blocks in 60, 120, and 220 grit
- A respirator rated for fine dust and solvent fumes, plus nitrile gloves
- A slow-speed drill with a mixing paddle attachment
- Foam rollers and a notched trowel for spreading
- A heat gun or small propane torch for bubble removal
- Disposable mixing buckets, TSP or a heavy-duty degreaser, two-part body filler for seams, painter's tape, and protective plastic sheeting
Buy more epoxy than you think you need. Running short mid-pour means an awkward seam line you'll be staring at for years.
How Do You Prepare Laminate for Epoxy?
Preparation is where most DIY pours succeed or fail. Skimp here and no amount of careful pouring later will save the finish.
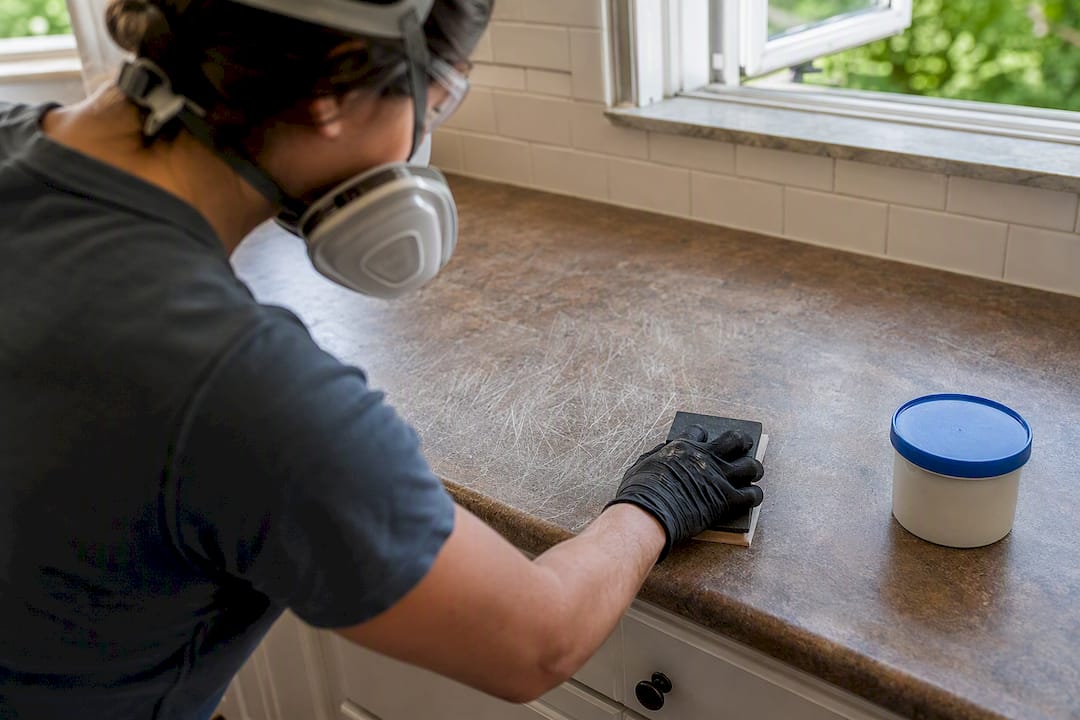
- Strip old caulk from seams and edges, then scrub the entire surface with TSP or a heavy-duty degreaser to pull years of cooking grease out of the laminate's pores.
- Fill chips, gouges, and seam gaps with a two-part body filler, then let it cure fully according to the product label. Rushing this step leaves shrinkage cracks that show through your flood coat.
- Sand the whole surface starting at 60 grit to knock down the laminate's factory sheen and create mechanical "tooth" for the primer to grab, then move to 120 and finish around 220 depending on what your epoxy manufacturer recommends.
- Vacuum thoroughly and wipe everything down with tack cloths. Any dust left behind becomes a permanent speck in your finish.
- Tape off backsplashes and walls, and lay plastic sheeting or rosin paper across cabinets and floors, since protecting adjacent surfaces from drips is standard practice on every real job site.
- Decide whether to pull the sink out entirely or mask it aggressively. Pulling it is more work upfront but gives you a cleaner edge and no risk of epoxy sealing the sink rim shut.
Pro Tip: If your laminate has any soft spots, bubbling, or delamination at the seams, stop and address the substrate before you touch it with sandpaper. Epoxy poured over an unstable base will crack no matter how well you prep the surface.
Work in a ventilated space and keep your respirator on through both the sanding and degreasing steps. If you find moisture damage under the laminate or the substrate feels spongy, that's a substrate problem no coating will fix. Call a professional before you go further.
How Do You Mix and Pour Epoxy Over a Countertop?
Once your primer or bonding undercoat has cured, the pour itself comes down to timing and technique.
- Read the mix ratio on the technical data sheet and measure it precisely. Eyeballing resin and hardener ratios is the single fastest way to end up with a tacky, never-fully-cured surface.
- Mix with a drill-mounted paddle at low speed for the full time the manufacturer specifies, usually a few minutes, scraping the sides and bottom of the bucket as you go so nothing settles unmixed.
- Pour in batches sized to your pot life. If your kit gives you a 30-minute working window, don't mix enough for an hour's worth of pouring.
- Spread from the center outward with a trowel, then smooth with a foam roller. Working wet-on-wet with different colors while the base coat is still workable is how you get marble or stone-look veining.
- Pass a heat gun or small propane torch in quick, sweeping motions a few inches above the surface to pop trapped air bubbles. Linger too long in one spot and you'll scorch the epoxy or create a crater.
A few things that separate a clean pour from a redo:
- Keep the torch moving; heat is for bubbles, not for "helping" the epoxy level itself.
- Run painter's tape along the underside of the countertop edge to catch drips before they cure into an ugly lip.
- Work with a second person on anything bigger than a small vanity top. One person mixing while the other pours and levels keeps you inside the pot life window.
- Plan a thin finishing coat if the flood coat leaves texture or dust nibs. A light final pass often gets you the true glass look that a single coat can't.
How Long Does Epoxy Take to Cure on a Countertop?
Cure time happens in stages, and jumping the gun at any of them causes fingerprints, dents, or dull spots that are hard to fix later.
- 24 to 48 hours: Surface is tack-free and safe for light touching, but not for real use, per most manufacturer guidance.
- 72 hours: Most epoxies can handle normal kitchen activity, light dishes, and wiping down, though you should still avoid heavy objects.
- 7 to 30 days: Full chemical cure and maximum hardness, with some products taking the full 30 days to reach their final strength.
Hold off reinstalling the sink and reconnecting plumbing until you've hit at least the 72-hour mark, and longer if you can manage it, since clamping fixtures down too early can print marks into a still-soft surface. Clean with mild soap and a soft cloth once you're back in normal use; skip abrasive scrub pads and never cut directly on the surface. A DIY overlay typically holds up for several years with reasonable care, though it won't match the heat and scratch resistance of granite or quartz, and setting hot pans directly on it or using it as a cutting board is what shortens its life fastest.
Why Do Epoxy Countertops Fail, and How Do You Fix It?
Most epoxy failures trace back to the same handful of causes.
- Peeling or bubbling weeks later usually means grease, moisture, or dust was trapped under the coat. Spot sand the affected area and recoat if it's isolated; a widespread failure means stripping back to bare laminate and starting over.
- Orange peel texture comes from rolling epoxy that's already too thick or working in a room that's too cold. Light sanding followed by a thin finishing coat usually smooths it out.
- Fish eyes are almost always contamination, often silicone-based cleaners or lotion residue on your hands. Wipe everything down with isopropyl alcohol before you mix your next batch.
- Runs at the edges mean you poured too fast or skipped the underside tape. Sand the drip once cured and touch up with a small brush.
Pro Tip: Do a small test pour on a scrap piece of laminate before committing to the full countertop. It costs you twenty minutes and catches contamination or mixing problems before they're permanent.
If you're seeing adhesion failure across large sections rather than isolated spots, that's usually a substrate issue, not a technique issue, and it's worth bringing in a professional.
What Would a Contractor Do Differently on This Job?
Contractor-grade prep leans on mechanical abrasion far more aggressively than most DIY guides recommend, which is why diamond grinding is standard on professional floor jobs. You can't run a grinder on a laminate countertop, but you can approximate the same principle with more aggressive hand sanding and a second full pass of bonding primer before your flood coat.
Certain conditions are worth handing off entirely: moisture intrusion under the laminate, any sign the substrate has separated from the cabinet base, or a countertop with multiple seams and an integrated sink that all need to cure as one continuous surface. Show Me Epoxy approaches countertop installations the same way it approaches floors, with thorough mechanical prep first, and offers a free on-site estimate so homeowners know what they're dealing with before committing either way.
— Stephen
DIY or Hire a Pro? A Quick Decision Guide
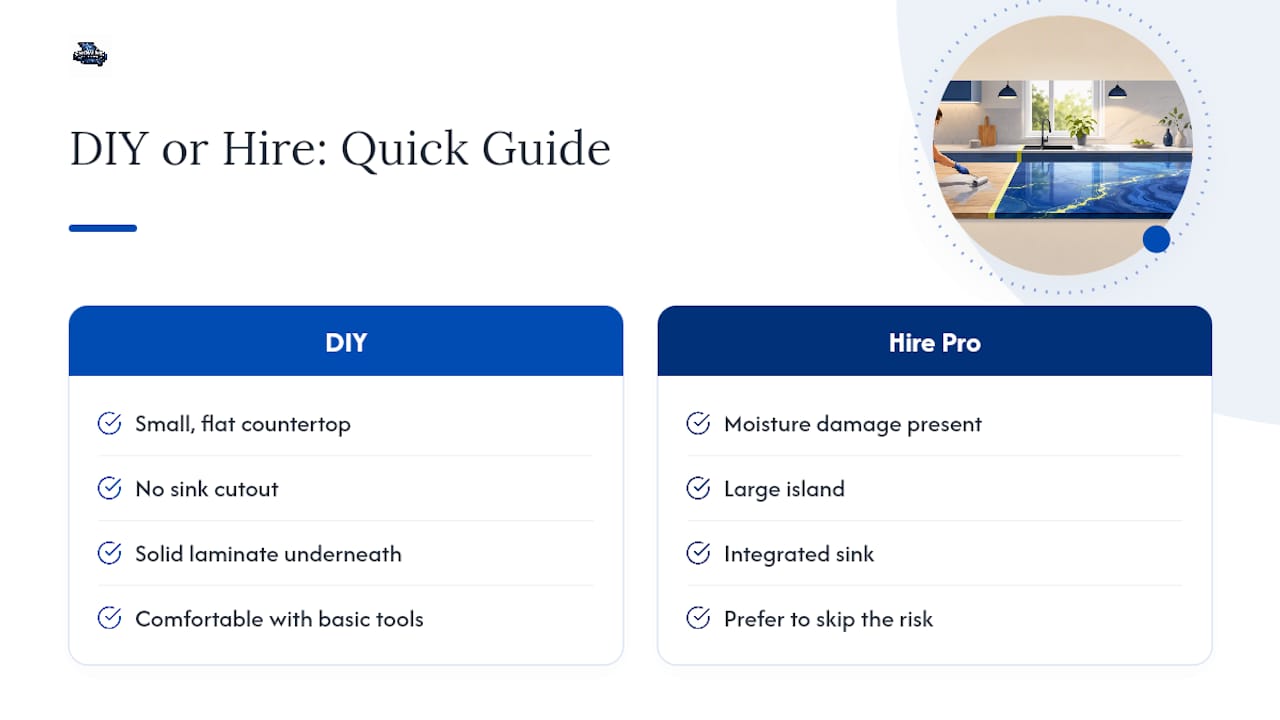
A small, flat countertop with no sink cutout and solid laminate underneath is a reasonable weekend DIY project for anyone comfortable with basic tools. Moisture damage, a large island, or an integrated sink push the job toward professional territory fast. Budget a full weekend if you're confident; if you'd rather skip the risk, the promo section below has your next step.
Ready for a Professional Countertop Finish?
If the sanding, priming, and bubble-chasing above sound like more weekend than you want to commit to, Some contractors handle the entire process with contractor-grade surface prep, using mechanical-bonding approaches applied to countertops and edges with industrial-grade materials built to provide durability beyond a typical DIY overlay.

A consultation starts with a look at your existing laminate, a conversation about color and finish options, and a straightforward quote with no pressure to sign on the spot. If you're weighing a broader kitchen refresh alongside the countertop, it's also worth planning your cabinet and pantry layout at the same time so everything comes together in one project instead of two. Reach out through the Show Me Epoxy contact page for a free quote, or visit Showmeepoxy to see finish examples before you decide which route fits your kitchen.
Sources
- The Best Epoxy for Countertops and Quick Kitchen Makeovers
- Pros and Cons of Epoxy Countertops: Everything You Need to Know
- Can You Use Epoxy Over Laminate Countertops?
FAQ
Is There a Way to Cover Laminate Countertops Without Replacing Them?
Yes. Epoxy resin overlays are one of the most common ways to cover worn laminate, transforming the surface into a seamless, glossy finish without demolition.
Will Epoxy Resin Stick to Laminate?
Epoxy adheres well to laminate once the surface is degreased, sanded to create mechanical grip, and treated with a bonding primer; skipping any of those steps is the top cause of adhesion failure.
How Can I Refinish My Laminate Countertop Without Replacing It?
Clean and sand the existing laminate, repair any chips with body filler, apply a bonding primer, then pour a countertop-grade epoxy flood coat over the surface for a refreshed, durable finish.
How Long Does It Take to Epoxy a Laminate Countertop?
Most DIYers finish the pour itself in a day, but plan for several days of prep beforehand and up to a month for the epoxy to reach full cure and hardness.
Can I Use Regular Floor Epoxy on a Countertop?
Stick with a countertop-specific kit instead. Floor epoxy isn't formulated for the self-leveling, crystal-clear finish a countertop flood coat needs, and it won't pair with the color and topcoat systems built for kitchen use.